1.2.4 Play Instruments
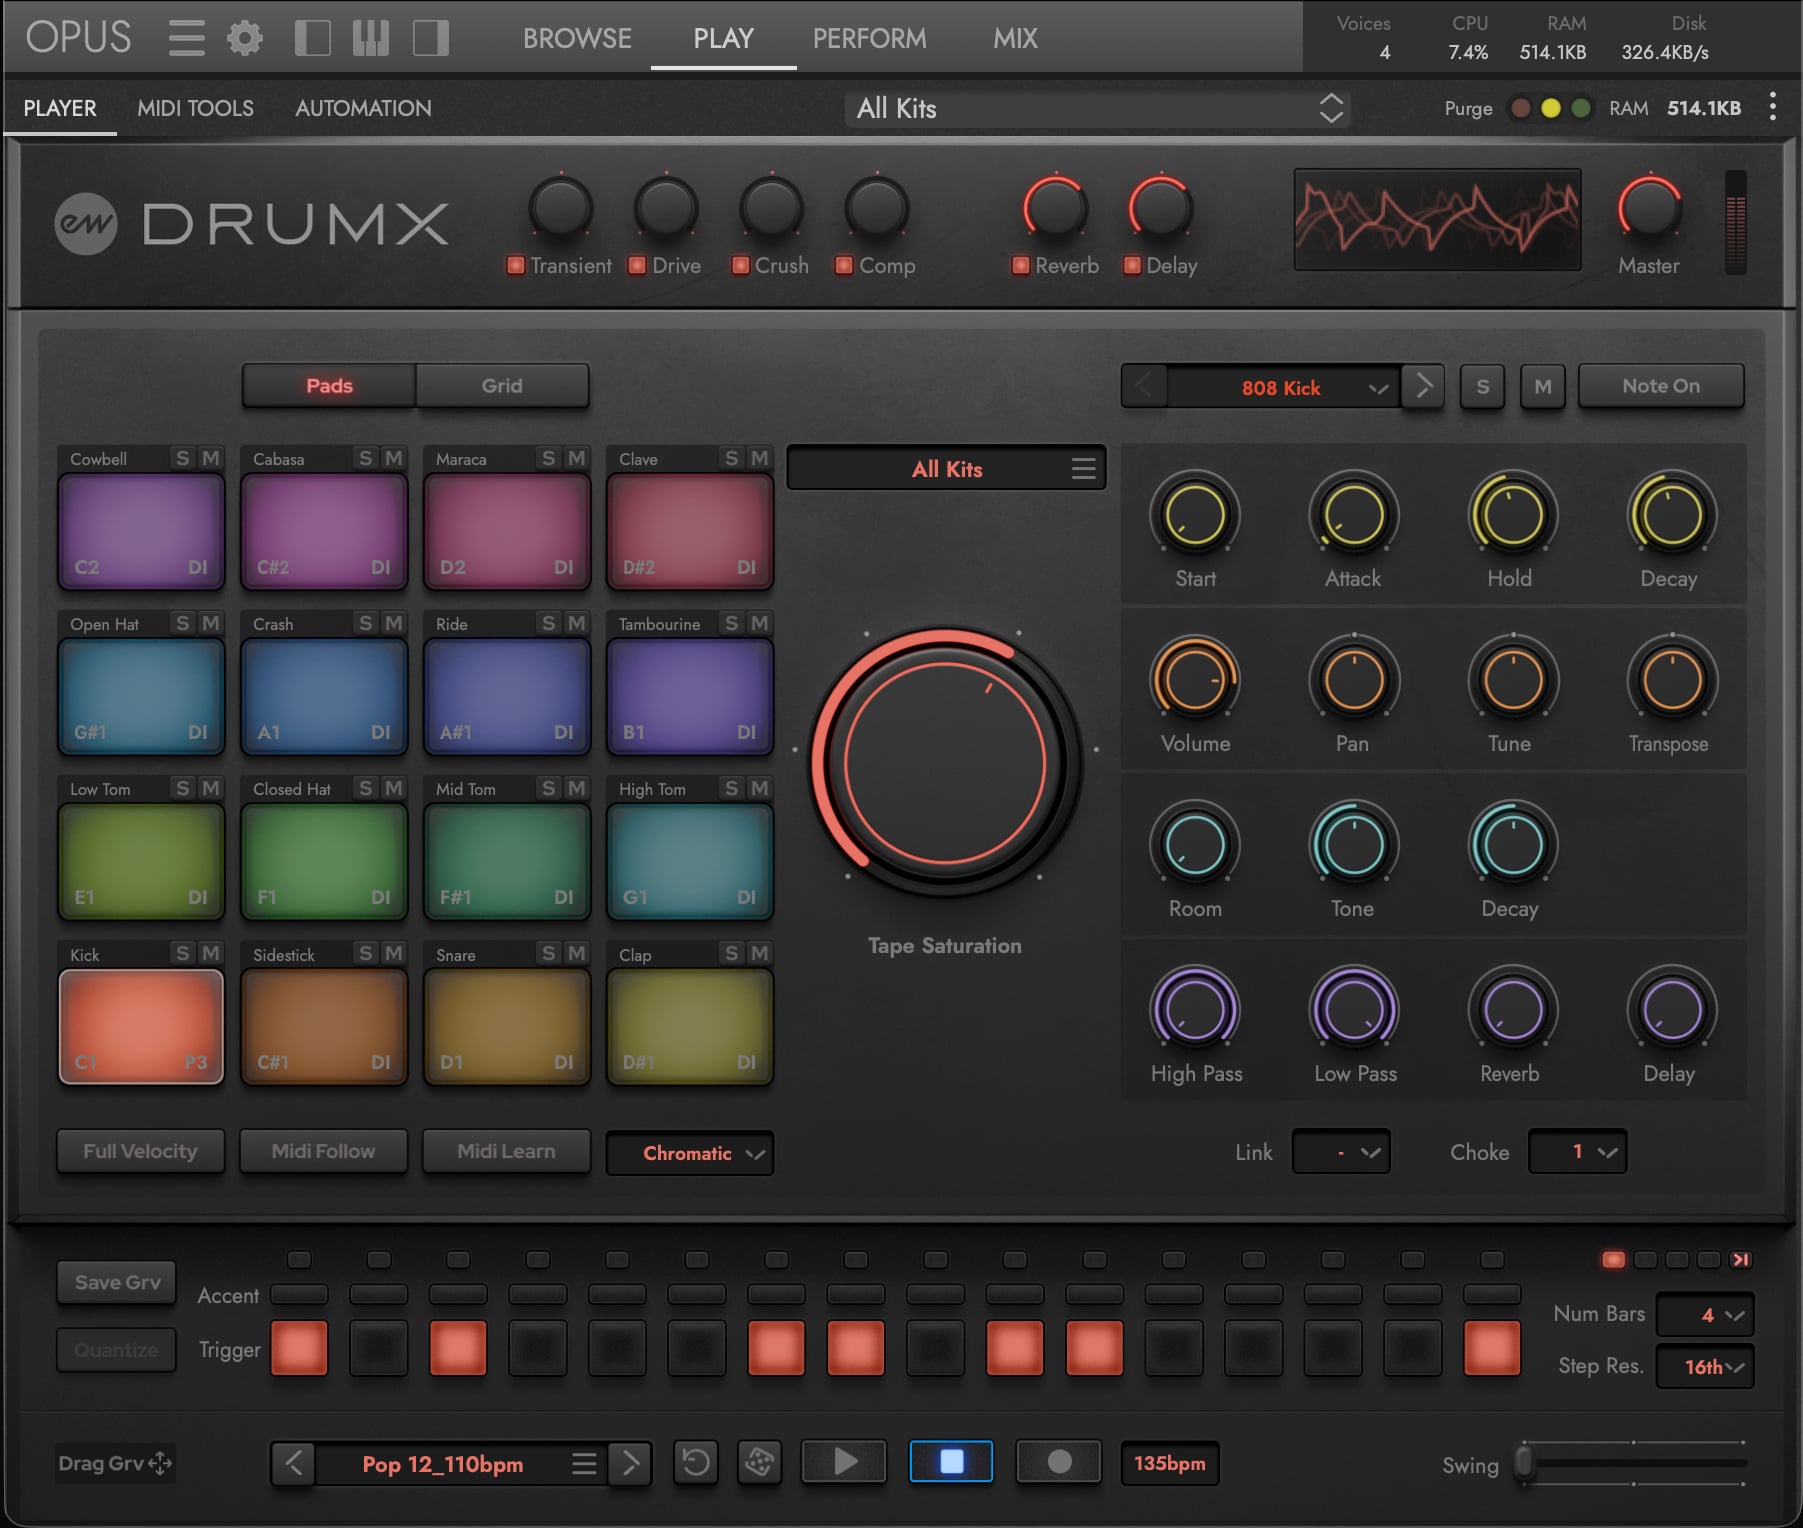
The Play page is home base for DrumX — a dedicated user interface where every control that shapes the instrument lives. Map your MIDI controller, playback the drum sequencer, sculpt each drum sound in the Pad Inspector, program patterns in the Grid, drive the signal through the Studer tape stages, and finish with global insert and send effects.
Click the Play page button in the Navigation Bar to enter the Play page, where the Player sub-page is selected by default and displays the custom DrumX user interface — with the Pads button selected to show the 16 drum pads in a 4x4 layout.
CONTINUE READING | SECTION 2.2.8 ADDITIONAL SUB-PAGES covers the MIDI Tools and Automation sub-pages briefly.
A The Focused Pad
The Focused Pad is the center of nearly every DrumX edit — whether you’re shaping a drum’s sound, dialing in tape saturation, or programming its pattern, you’re always working on one pad at a time.
To focus a pad, click on it — a highlight appears around the pad to indicate the current selection. Alternatively, enable the MIDI Follow button so pad selection tracks your MIDI input — the last-played note becomes the Focused Pad.

B Setup Your MIDI Controller
Click in the MIDI Map menu to select between the available options, or create your own. The default Chromatic map is ideal for drum pad controllers, and the General MIDI standard GM Drum map is ideal for keyboard controllers. User-built Custom maps are also supported via MIDI Learn. See SECTION 2.2.2 PADS §A for the full MIDI Map setup, and SECTION 2.1.3 DRUM KITS AND SOUNDS for the per-kit pad layouts.

C Crafting the Drum Sound
The Pad Inspector shapes the Focused Pad with envelope controls, volume/pan/tune, room ambience, machine-specific parameters, filters, reverb/delay sends, and choke/link grouping — see SECTION 2.2.3 PAD INSPECTOR for the full breakdown.
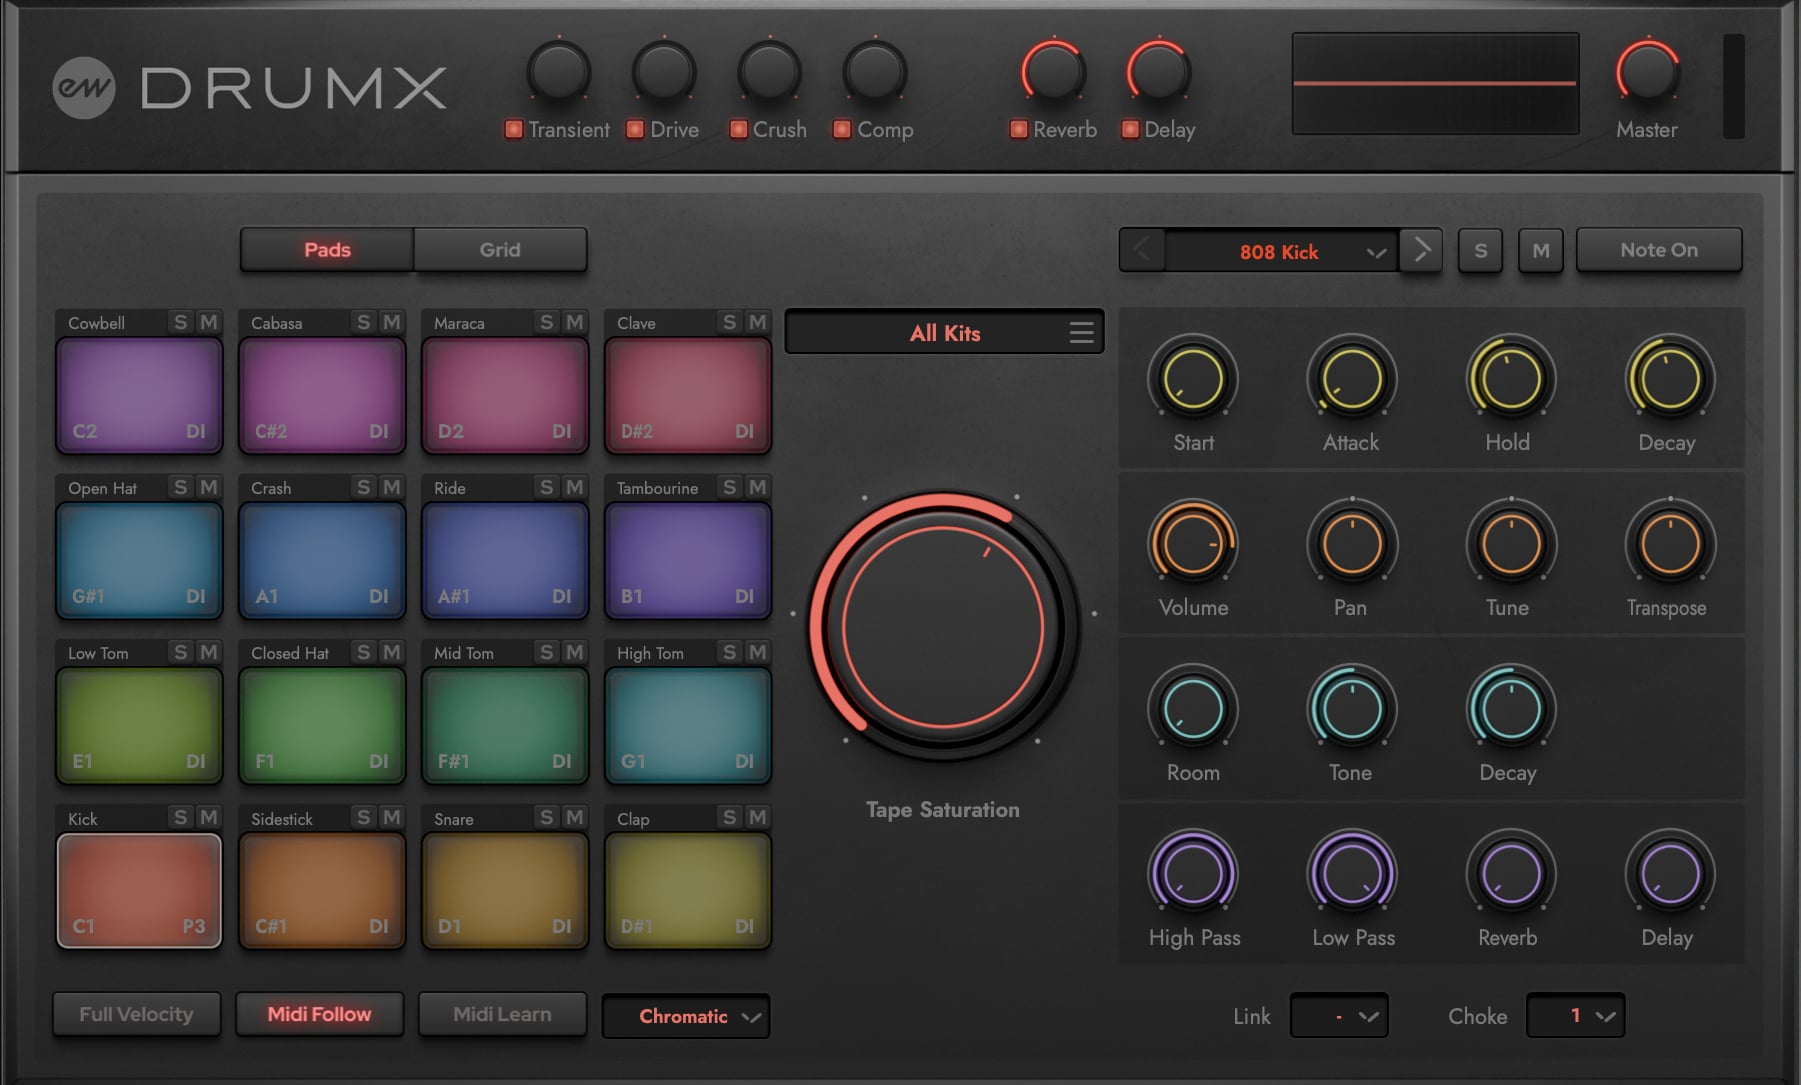
The large Tape Saturation knob in the middle of the interface is a defining DrumX feature: every drum is captured through multiple tape stages, from a clean DI to heavy analog saturation, and the knob switches between them for the currently Focused Pad. Each pad’s current Tape Selection appears in its lower-right corner. See SECTION 2.2.4 TAPE SATURATION for the per-stage breakdown.
D Play and Record the Drum Kit
To record a pattern, click the Record button to arm, then press the Play button to capture your playing. Play the pads or keys of your controller starting on MIDI note C1 (mapped to a Kick drum by default) through the 16 pads extending up to MIDI note D#2.

E Browsing and Sequencing a Groove
Click the Grid button to program all 16 tracks of the groove at once. Toggle drums in and out with the per-row power buttons, focus a drum with its name label (it becomes the Focused Pad), toggle pattern steps in the Grid Sequencer, and set per-drum levels with the volume faders on the right. Program the pattern of the Focused Pad — a single track — in the Focused Pattern strip that runs along the bottom of the interface, toggling Trigger steps to program hits and Accent steps to add dynamics. See SECTION 2.2.5 GRID SEQUENCER for full per-control detail.
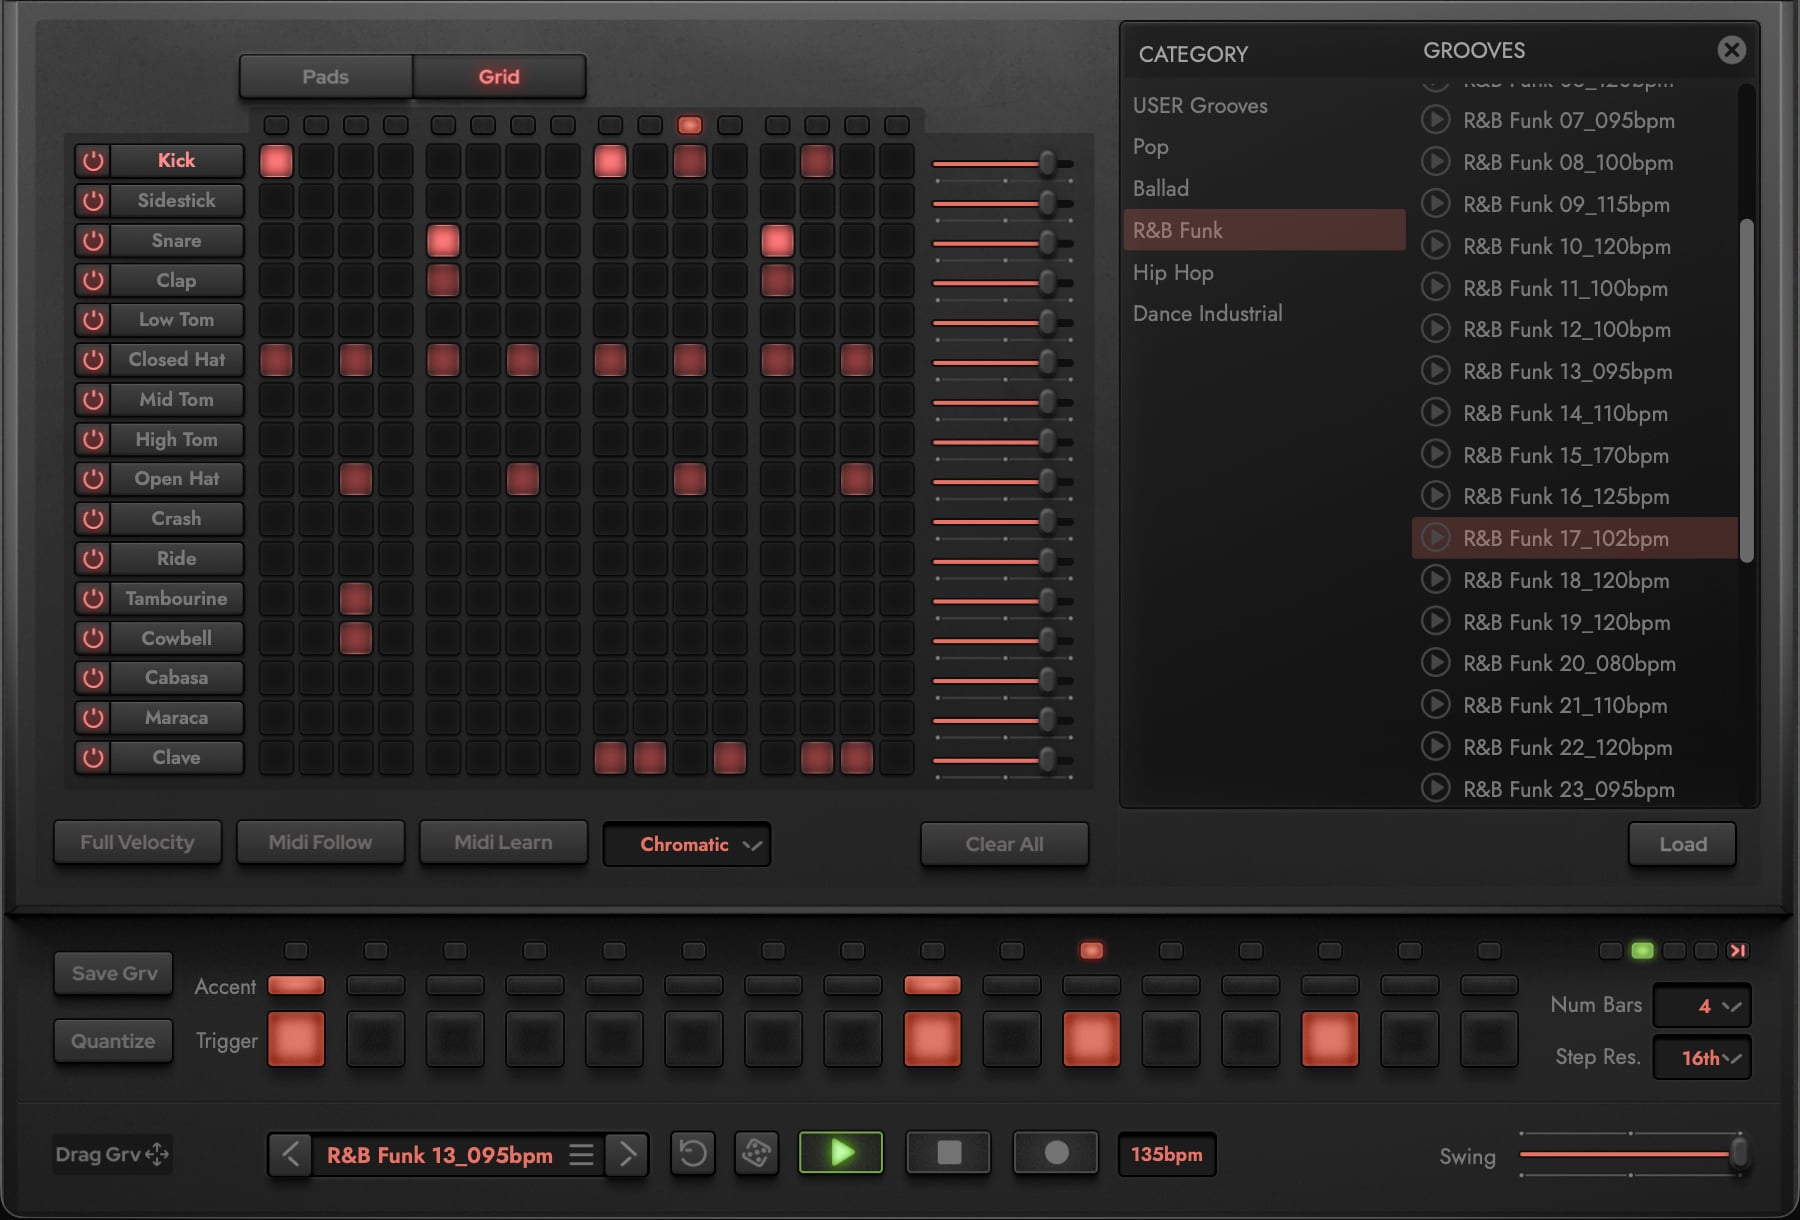
Every Jimmy Jam Kit ships with its signature groove embedded in the instrument file — load the kit and the groove loads with it, at the designated tempo, just as Jimmy originally produced it.
Those same grooves can also be loaded independently onto any other drum kit via the Groove Browser overlay — open it by clicking the Groove Menu in the Groove Engine area, or step through grooves directly with the Previous Groove and Next Groove arrows flanking it. Jimmy Jam Grooves are organized by genre folders (Ballad, Dance Industrial, Hip Hop, Pop, R&B Funk), and you can also save your own patterns to the User Grooves tab.
PLEASE NOTE: Grooves are kit-agnostic, but if a groove was originally built for a machine with a different set of sounds, some steps may trigger empty pads.
CONTINUE READING | SECTION 2.1 DRUMX INSTRUMENTS for more on Jimmy Jam Kits and how grooves ship bundled with instruments, and SECTION 2.2.7 GROOVE BROWSER for a detailed breakdown of the Groove Browser.
F Final Polish with Global Effects
Finalize the entire kit with the global controls along the top of the interface: Global Insert Effects macros (Transient, Drive, Crush, Comp) that shape the master bus, Global Send Effects (Reverb, Delay) that blend in ambience, and the Master Volume that sets the final output level.

PLEASE NOTE: These knobs are macros that drive multiple parameters on the Master channel — use them for quick shaping, or open the Mix page to edit the underlying effects in detail.
CONTINUE READING | SECTION 2.2 DRUMX CONTROLS for a deep dive into every control available on the Play page.