2.3.3 Dynamic Mixer
The Dynamic Mixer is where you sculpt your arrangement’s sound. Access it by clicking the Shape tab at the top of the interface.
The Dynamic Mixer displays 10 instrument slots, five at a time. Use the 1-5 / 6-10 buttons on either side of the rack to swap between the two halves. Each slot is a vertical Channel Strip with a full set of mixing controls.
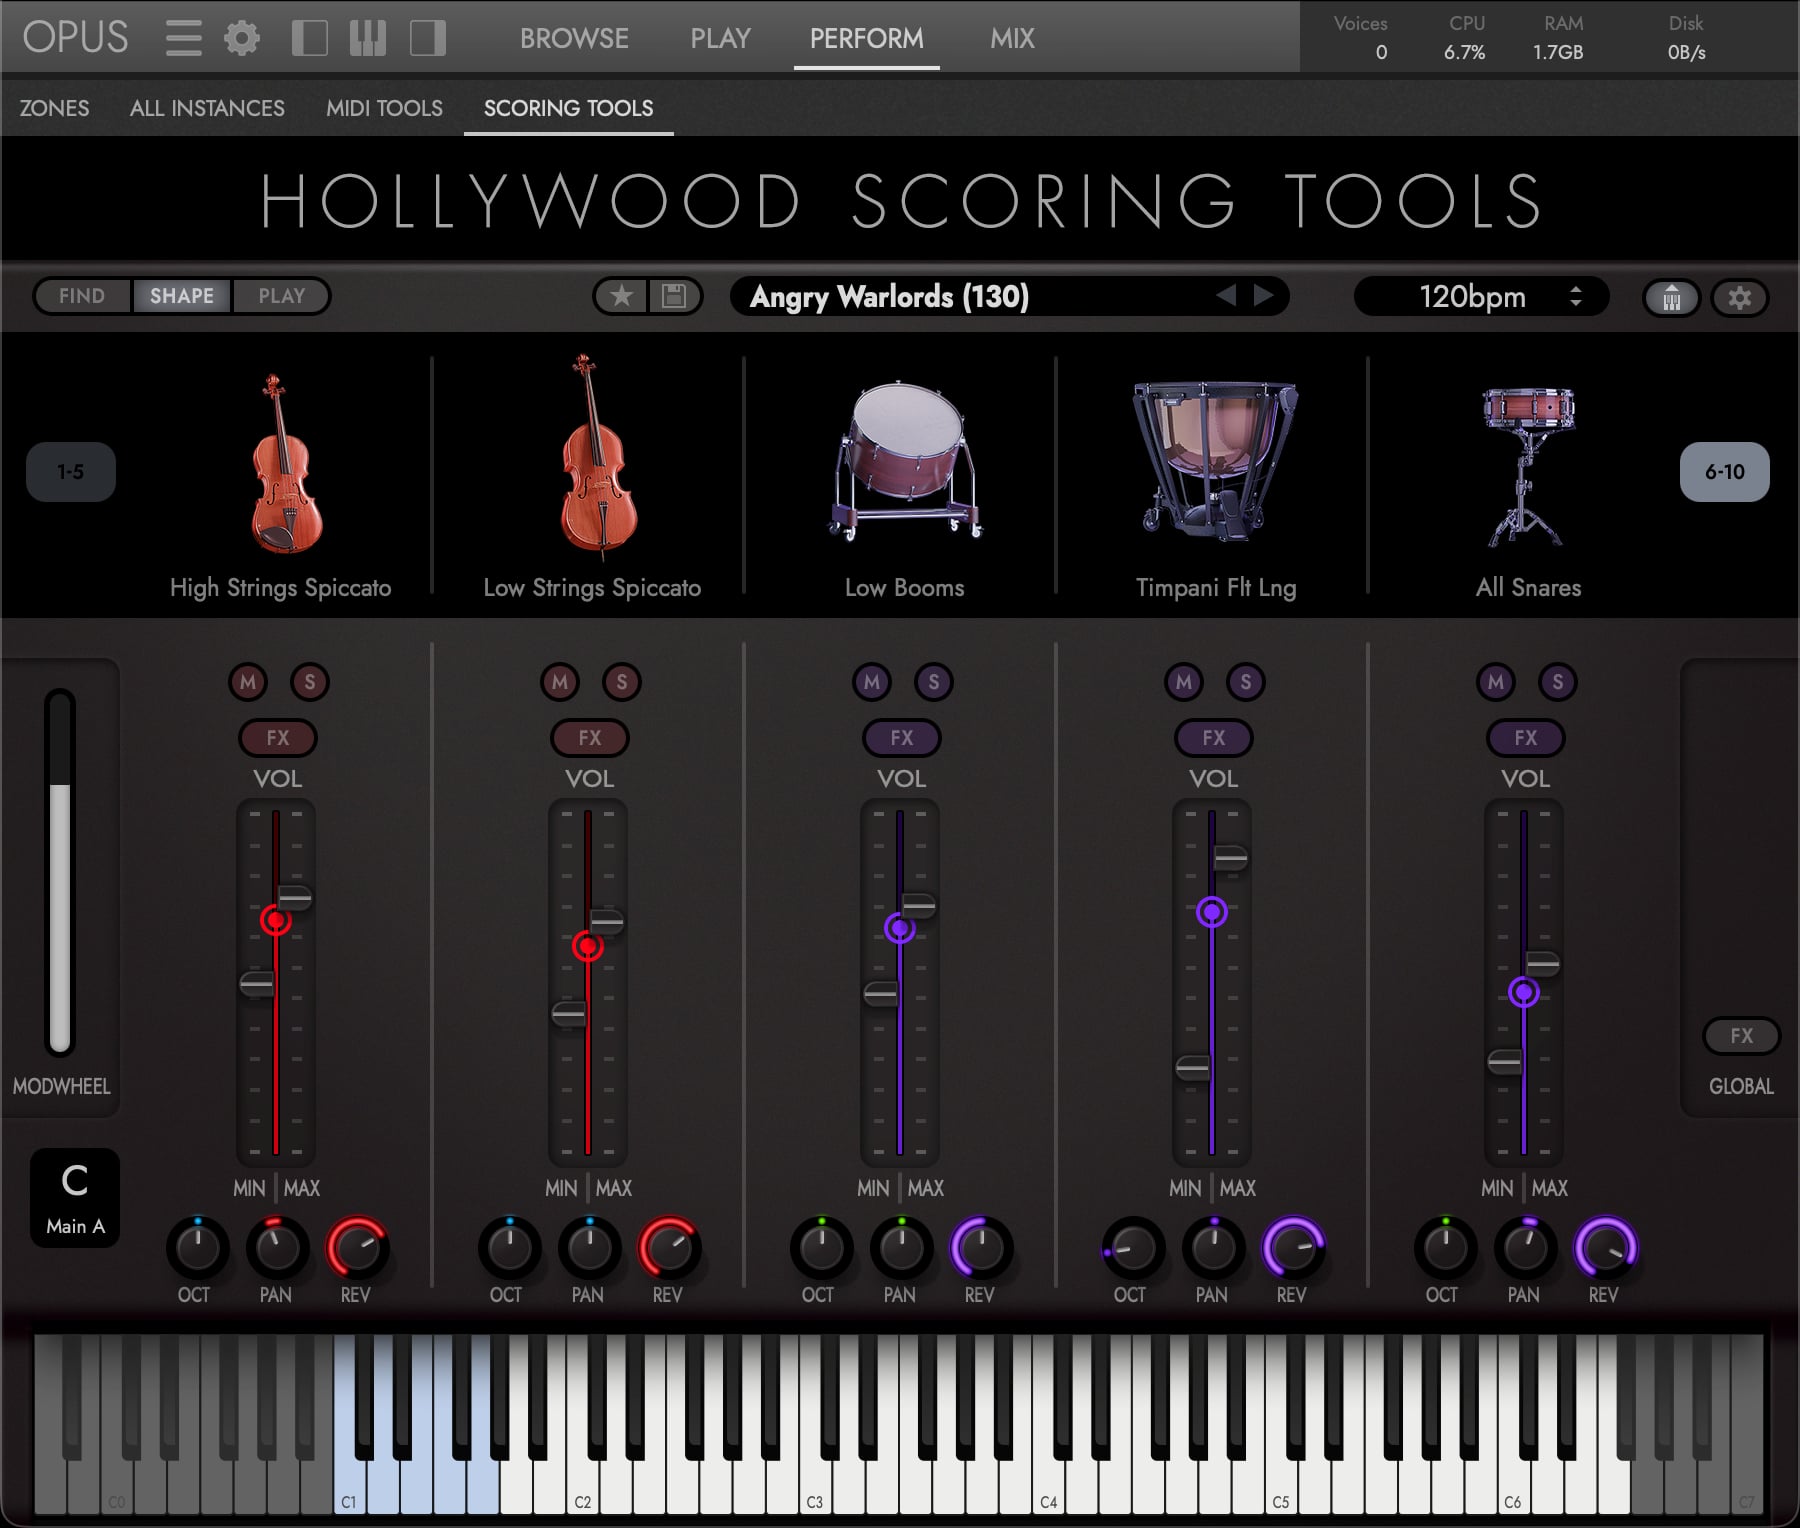
A Per-Slot Controls
Each slot in the Dynamic Mixer provides the following controls:
| Control | Description |
|---|---|
| Instrument Name | Displays the instrument’s icon and name; click to open the Instrument Browser and change the instrument in this slot |
| Volume Fader | Main volume level for this slot |
| Min Handle | Minimum volume level when the mod wheel is at position 0 |
| Max Handle | Maximum volume level when the mod wheel is at position 127 |
| Level Meters | Stereo (L/R) level meters showing the current output |
| Pan | Stereo panning position |
| Octave | Octave shift (transpose the instrument up or down) |
| Reverb Send | Amount of signal sent to the global reverb |
| Mute | Mute this slot |
| Solo | Solo this slot (mutes all other slots) |
| FX | Opens the slot’s FX page: EQ – ENV and three Insert FX |
PLEASE NOTE: These slot controls are the same parameters Opus exposes in its own mixer, and the two stay in sync in both directions: move a fader on the Opus Mix page and the Dynamic Mixer follows, and vice versa. Insert FX track the same way, and an insert’s extra Opus parameters, the ones the FX page does not show, are saved with your Score too if you change them from their defaults on the Mix page.
B Mod Wheel Dynamic Control
The key feature of the Dynamic Mixer is mod wheel-linked volume control. Each slot has independent min and max volume handles on the fader:
- At mod wheel position 0, the slot plays at its minimum volume setting
- At mod wheel position 127, the slot plays at its maximum volume setting
- The mod wheel smoothly interpolates between min and max
A freshly loaded Score starts the controller near three-quarters travel rather than at zero, so it sounds full as soon as you play. Pull it back to thin the arrangement out.
By staggering the min/max ranges across different slots, you create dynamic arrangements that evolve with the mod wheel. For example:
- Strings might have min=60, max=100, always present but getting louder
- Brass might have min=0, max=90, entering only as the mod wheel pushes higher
- Percussion might have min=0, max=70, adding impact at moderate to high dynamics
This creates sophisticated dynamic builds where instruments naturally fade in and out as you perform.
PLEASE NOTE: Mod-wheel and CC automation apply to all 10 slots at once, including any slots on the other page, so the entire arrangement responds to your dynamics, not only the five slots currently on screen.
Link and Sync
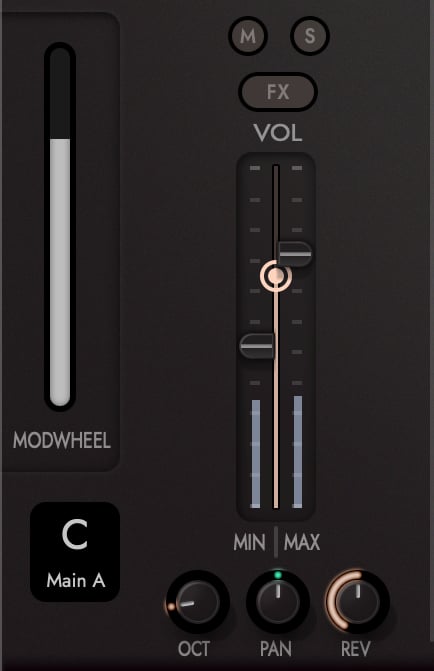
Each volume fader carries a link toggle. Linked, the dynamics controller sweeps the live level between the min and max handles as you play, the dynamic range described above; unlinked, the fader is a single fixed level. The same handles and link appear on the Attack and Release controls of the EQ – ENV tab and on every Insert FX parameter, so each of those can ride the mod wheel too. Time-based parameters, a delay’s time for example, add a sync toggle that locks them to the host’s tempo.
C Instrument Browser
Click any slot’s Instrument Name button to open the built-in Instrument Browser, a 3-column interface showing:
- Category: Orchestral, Synth, Band, World, Misc
- Section: Sub-categories within each category
- Sound: Individual instruments, listed alphabetically
The strings are listed here as High Strings and Low Strings (High Strings Sustain, Low Strings Spiccato and so on). The Opus Browse page lists the same instruments as Strings High and Strings Low.
Select an instrument and click Select to load it into the slot, or click Delete to clear the slot.
A Load with default FX toggle sits alongside them, and it is on by default. Leave it on and each instrument arrives with its own factory FX chain, replacing whatever was on the slot. Switch it off before selecting to keep the FX you have already dialled in, useful when you are auditioning instruments through a chain you have built and do not want to lose it with every swap.
PLEASE NOTE: The pattern survives the swap. The pitch matrix and the per-step velocities are carried over to the new instrument, in all four sections, so you can audition a line through different instruments without rebuilding it. Two smaller things do change: the slot’s Octave, Repeat and Bar Reset return to their defaults, and if the new instrument is a different kind from the old one the note order and rate follow it: a sustain instrument arrives on All (Chord) at the Sustain rate, a drum kit on Custom at 1/16. Swapping like for like leaves both alone.
D Per-Slot FX Page
Click a slot’s FX button to open its FX page. Four buttons run down the left, each with its own power switch: EQ – ENV first, the 3-band EQ with Attack and Release, then the slot’s three Insert FX. Every control on the page is covered in SECTION 2.3.6 EFFECTS.