1.1.2 Walkthrough
From a fresh install to a finished cue, this section guides you through setting up Opus for the first time, opening the library and loading the Scoring Engine. From there, load a Score and hold a single chord to hear an arrangement of ten instruments, shape it with the mod wheel, and move between its sections with the keyswitches. The closing sections step outside the engine, where any of the 164 instruments can be loaded and played on its own.
A Launch Opus
Hollywood Scoring Tools runs inside Opus, the sample engine software behind every EastWest product. On first launch the Startup Wizard tunes CPU and disk settings to your machine and sets the Server Region for downloads.
Two important setup options live in the Settings Menu:
- Preferences holds the audio engine, disk, MIDI, display and load settings.
- Setup Audio and MIDI sets the audio device Opus plays through and the MIDI inputs it listens to.
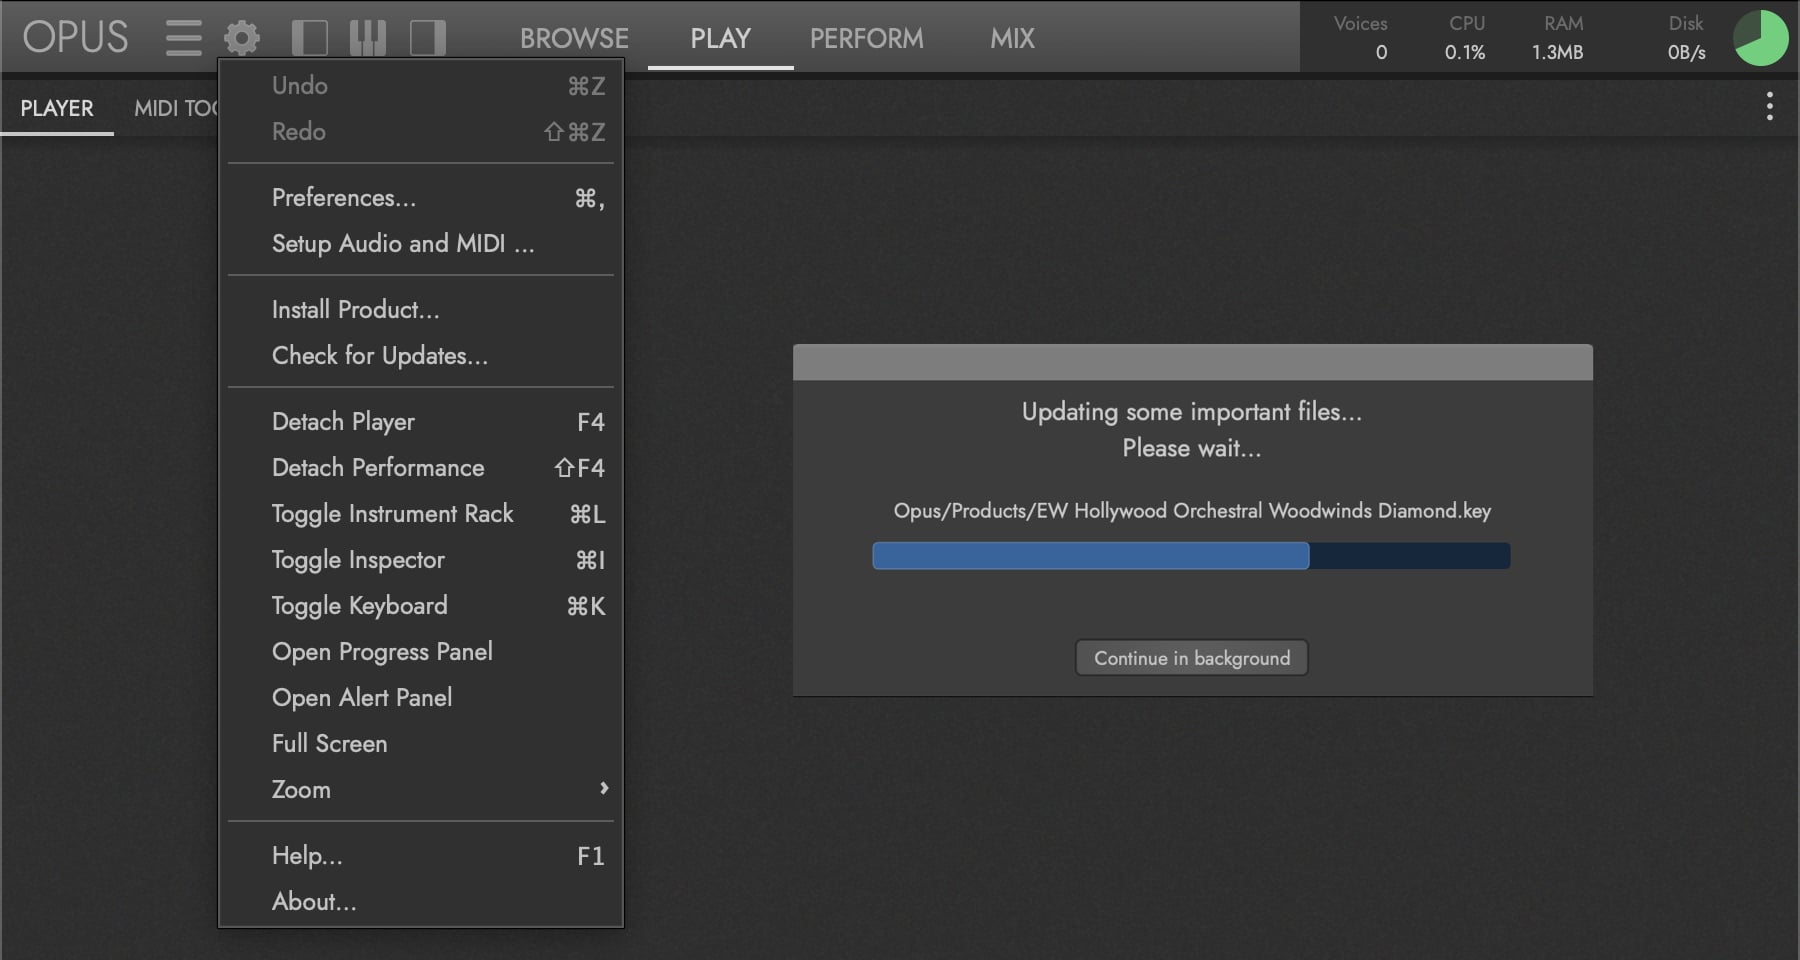
An Auto Update runs on launch whenever a new update is waiting. Click Continue in background to close the dialog and carry on working, then watch the Progress Wheel in the top-right corner of Opus: it fills green as the download continues and clears when it finishes.
B Load Scoring Tools
Click the Browse page button in the Navigation Bar. The page opens on the Installed tab. Click EW Hollywood Scoring Tools in the list of installed libraries to begin.
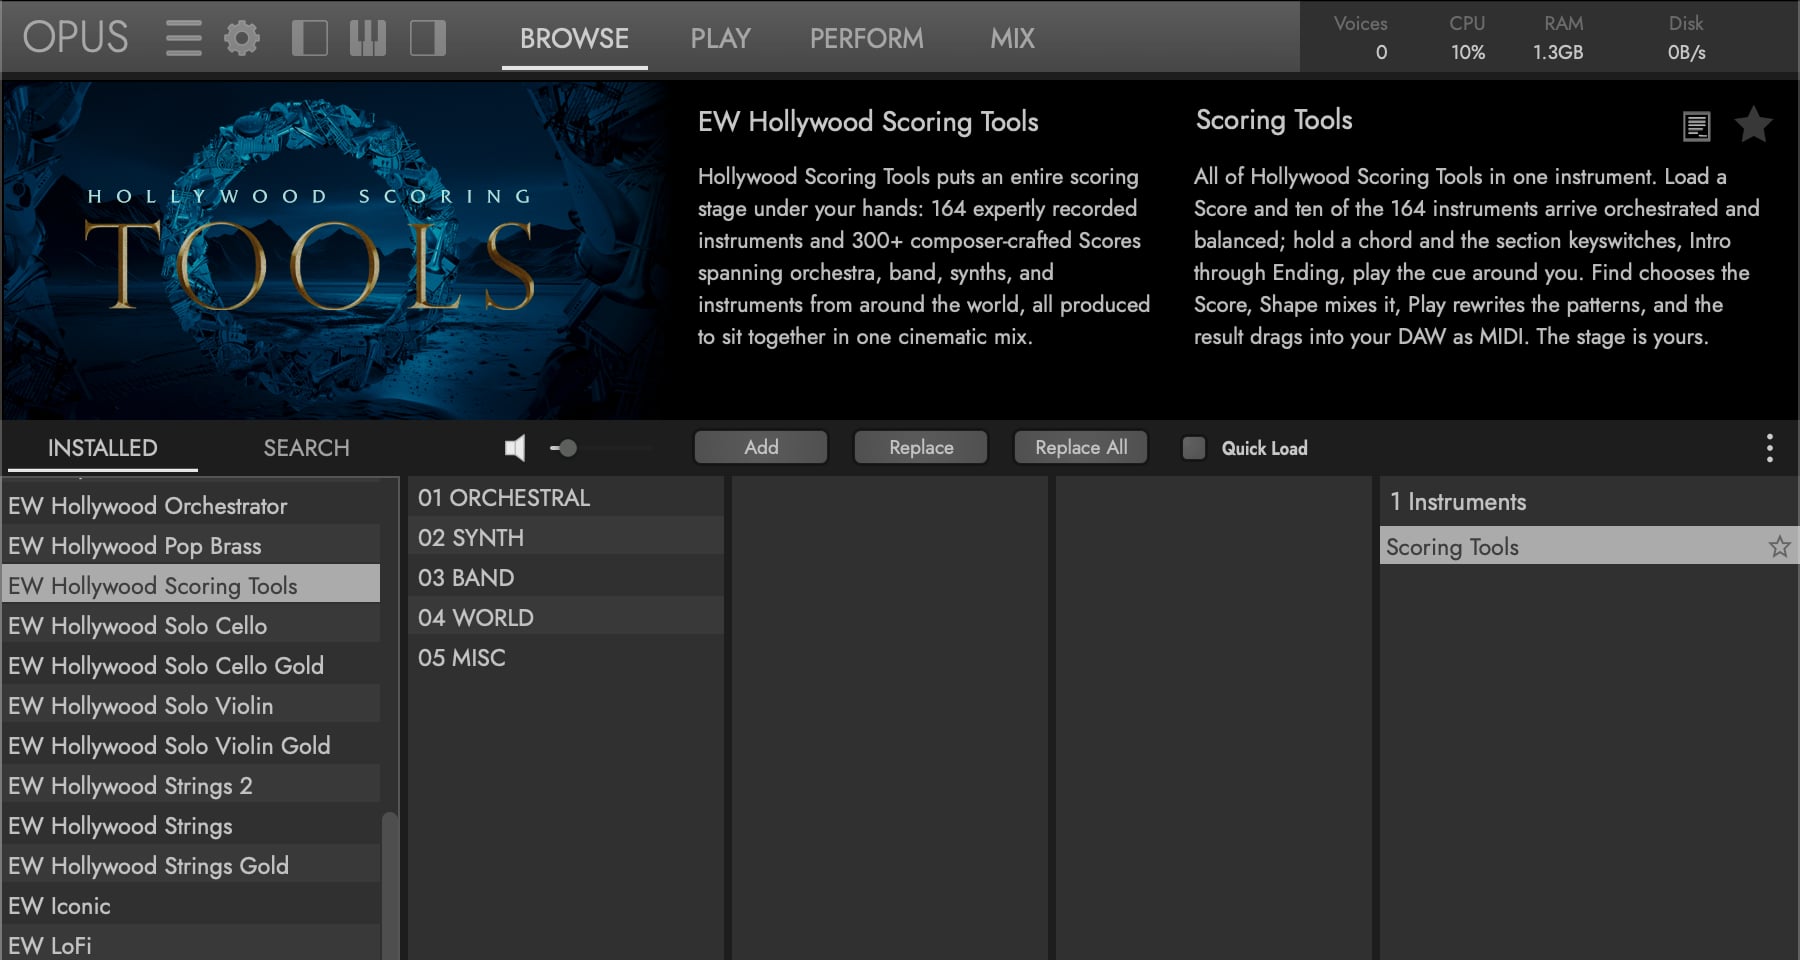
Inside the library’s instruments folder you will find:
- The Scoring Tools performance file, at the top of the Results List. Double-click it to open the Scoring Engine: 300+ Scores, ten instrument slots, arrangement, mixing and effects in one place.
- Five Categories holding the 164 individual instruments, Orchestral ▸ Strings for example. Double-click one to play it on its own, with the standard Opus pages around it.
PLEASE NOTE: Opus only switches page by itself while Double Click in Browser Shows Play/Perform Page is on, in the Settings Menu under Preferences ▸ Other. It is on for a new installation, but Preferences survive an update.
The Scoring Engine is the main way to work with this library, and the rest of this page starts there. The individual instruments are the same sounds the engine draws on, available on their own whenever you want to play or record a single part; §D below covers that.
CONTINUE READING | SECTION 2.1 INSTRUMENTS for the full breakdown of what the library contains.
C The Scoring Engine
Load the special Scoring Tools performance file described above and Opus opens the Perform page on its Scoring Tools sub-page. That is where the Scoring Engine lives. If Opus stays on the Browse page instead, see the note in §B above.

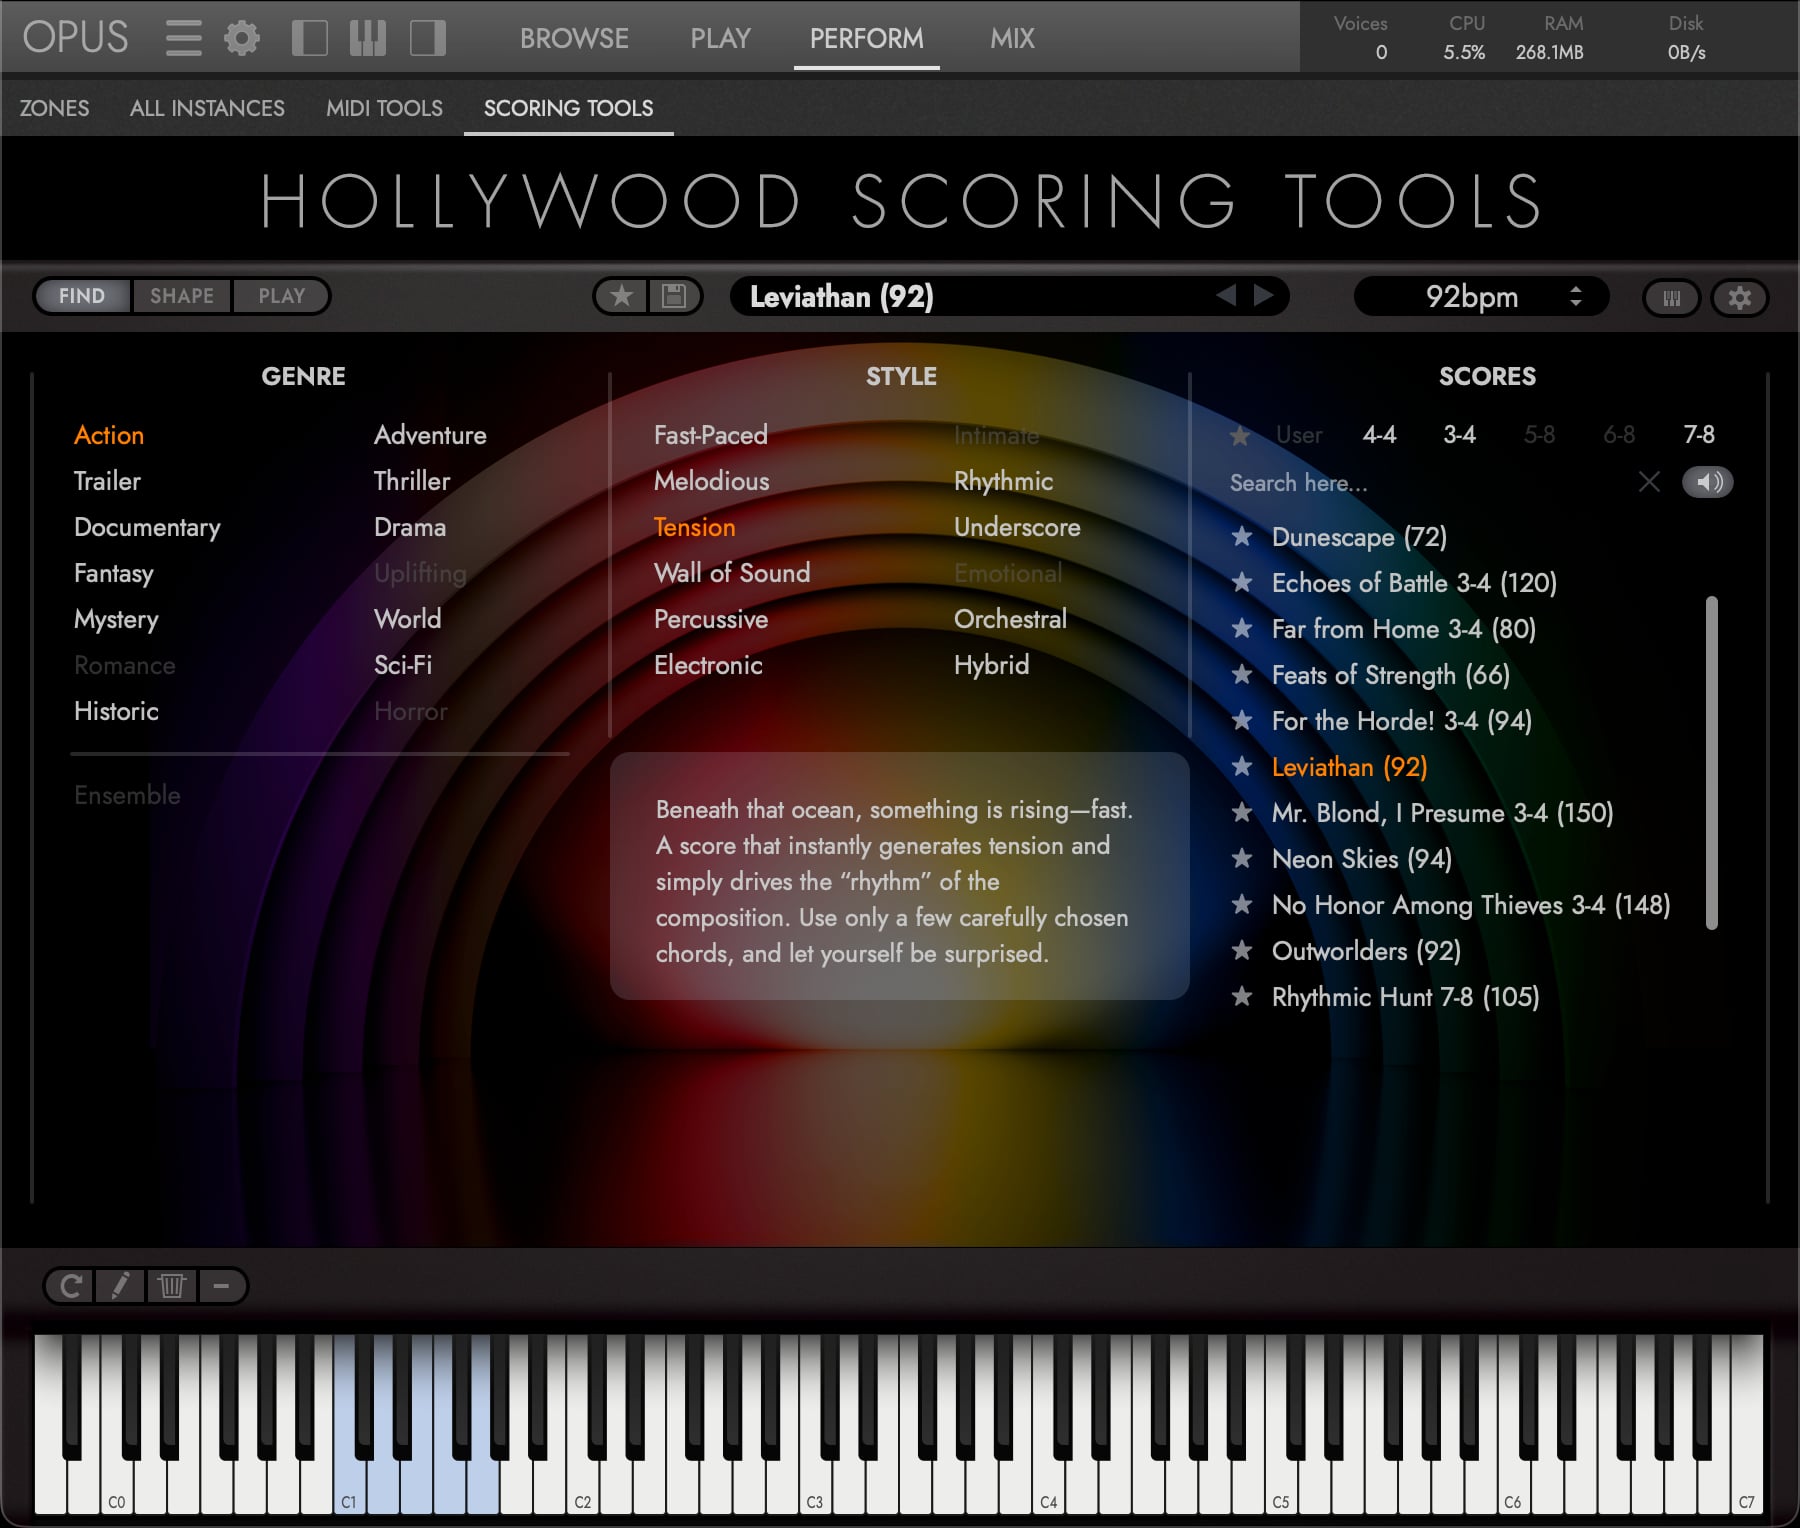
The Controls Bar runs across the top of the engine and stays put whatever you are doing. Reading left to right, it starts with Find, Shape and Play, the three tabs the whole engine is organised around, with Find selected by default. After them come the favourite and save buttons, the Score you have loaded with arrows to step through the rest, the tempo, MIDI export and the Settings overlay.
1. Pick a Score
The Find tab is the Score Browser. Narrow the list by Genre and Style, then choose from the Scores column, where your own saved User Scores sit alongside the factory ones. Refer to the Info Display for composer notes about how the Score was meant to be played.
2. Hold a Chord
A Score loads across all ten slots, already orchestrated and balanced. From there:
- Hold a chord. The arrangement plays for as long as you hold it. One chord, ten instruments.
- Move the mod wheel. Instruments fade in and out according to their per-slot ranges, so one controller takes you from a sparse texture to the full ensemble. The wheel starts around three-quarters travel, so a freshly loaded Score sounds immediately engaging.
- Change sections with the keyswitches. A Score holds four sections and an Ending, and you move between them in real time on the Keyswitches while holding a chord.
| Key | Section |
|---|---|
| C1 | Intro |
| D1 | Main A |
| E1 | Main B |
| F1 | Outro |
| G1 | Ending: a stop, not a section |
PLEASE NOTE: The whole span from C1 to G1 is reserved, so notes in that octave will not sound. Move the keyswitches down an octave in the Settings overlay if you need that register.
3. Balance the Mix
The Shape tab is the Dynamic Mixer. Each slot has a volume fader with min and max handles tied to the mod wheel, plus Mute, Solo, Pan, Octave and Reverb Send. Setting the min and max ranges decides which instruments appear at which dynamic level: strings soft at the bottom, brass arriving at the top.
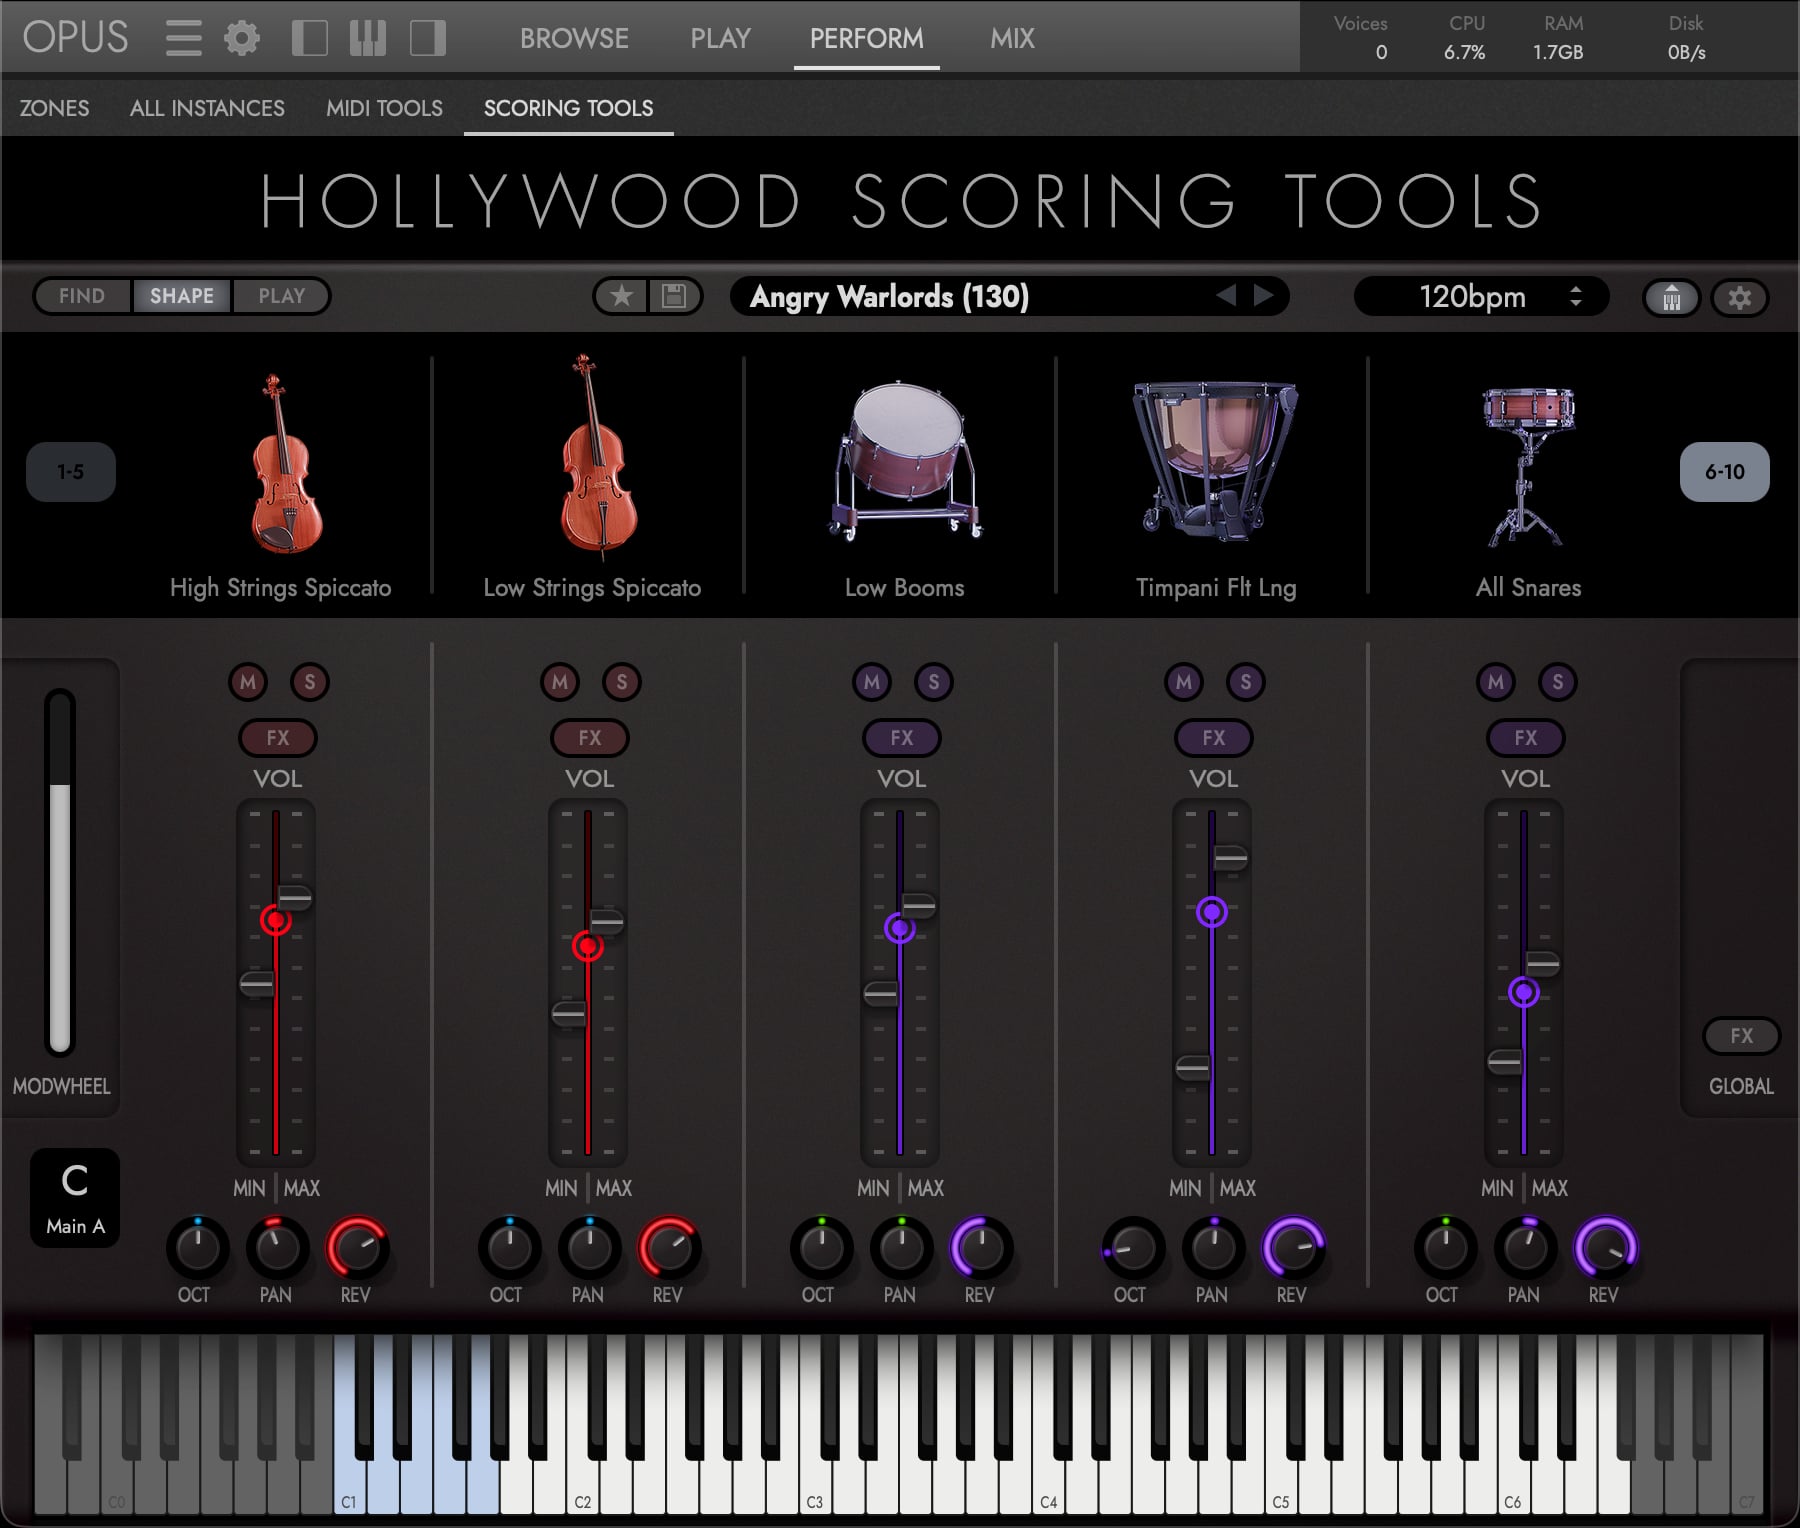
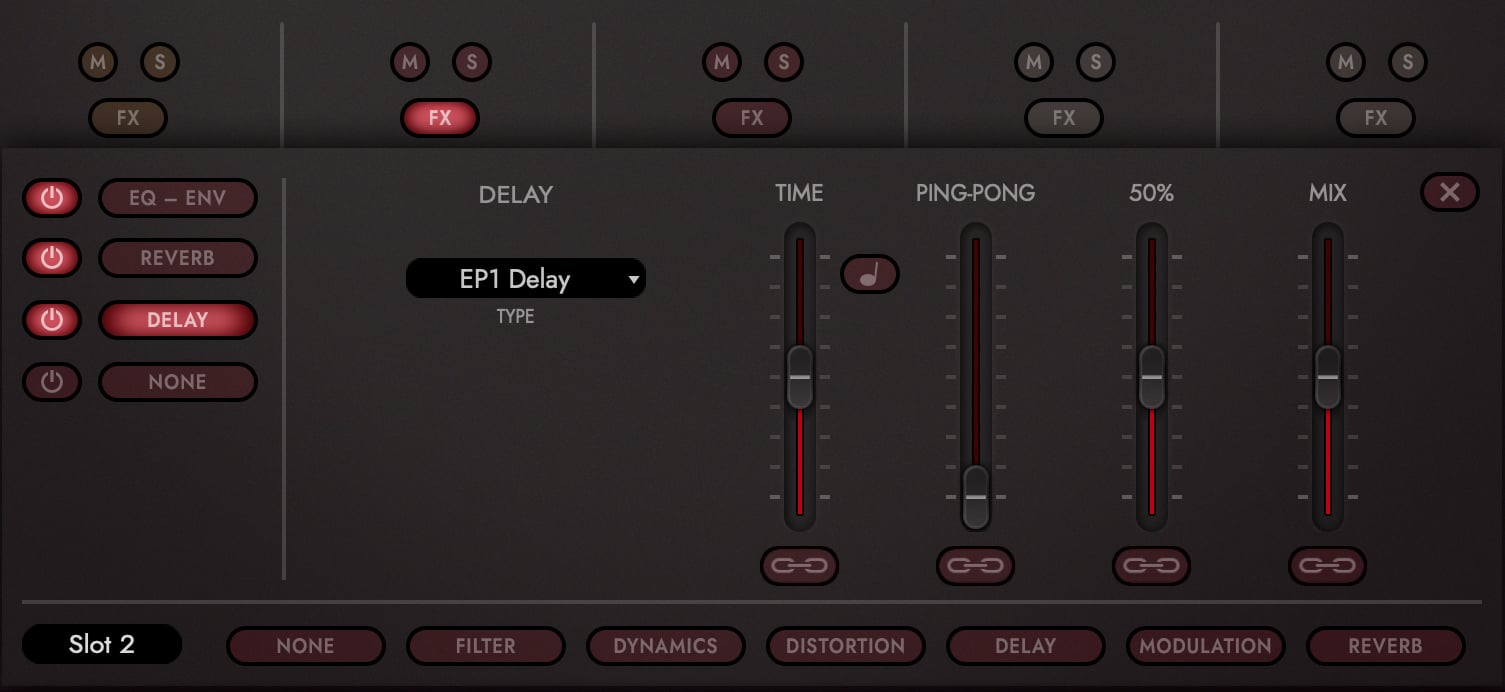
Each slot also carries a 3-band EQ, Attack and Release sliders, and a three-slot insert rack, with a global reverb that sits behind the per-slot sends. A slot’s FX button opens its rack. Every control on the FX page has the same min and max handles as the fader, so an effect can ride the mod wheel too.
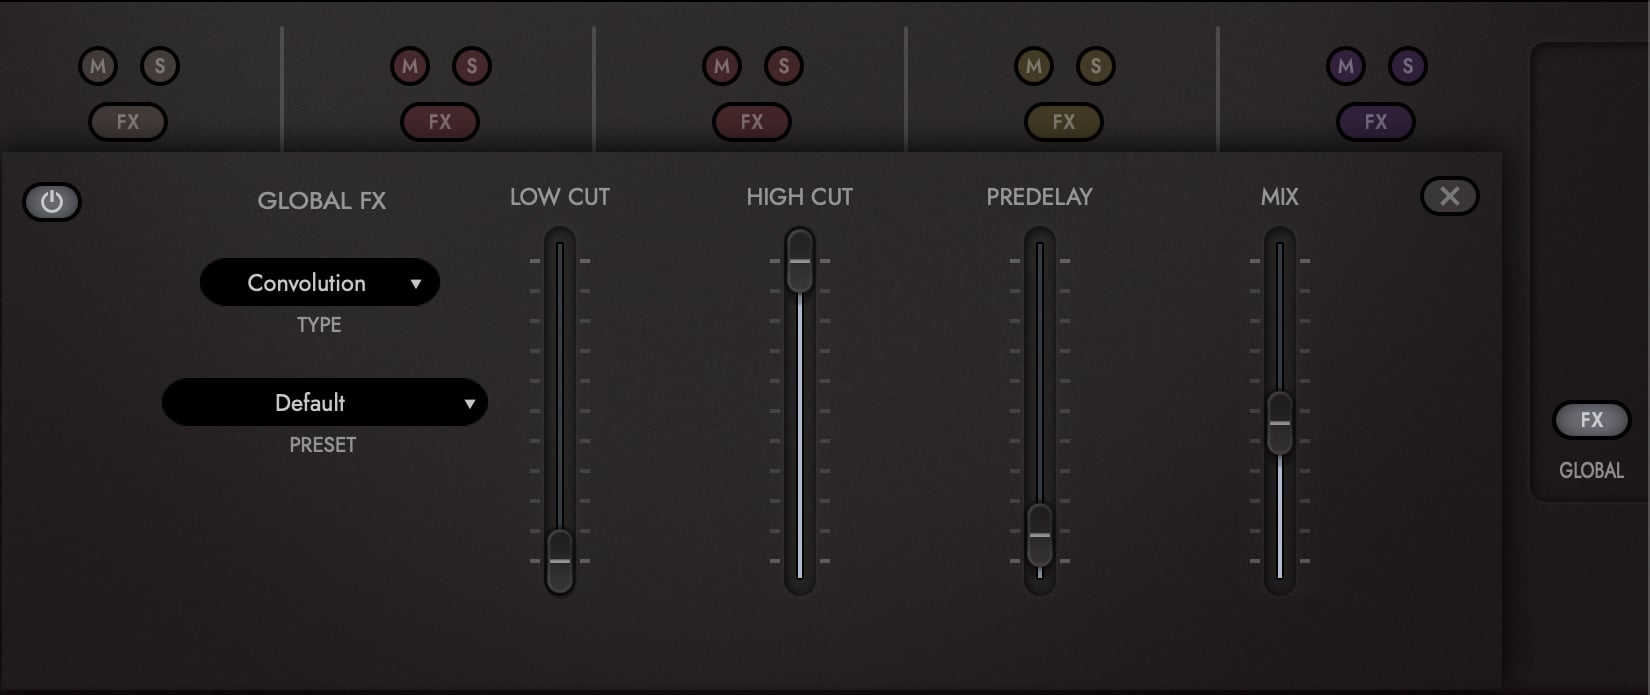
The Global FX button on the right opens the reverb those sends feed. A Type menu switches between Convolution, which plays the arrangement through a recording of a real space, and Algorithmic, which builds the space instead. The Preset menu beneath it loads a starting point for either.
PLEASE NOTE: The Opus Mix page stays linked underneath: volume, pan, reverb send and inserts move together, and anything set there is saved in the Score. See SECTION 2.3.3 DYNAMIC MIXER.
4. Animate the Arrangement
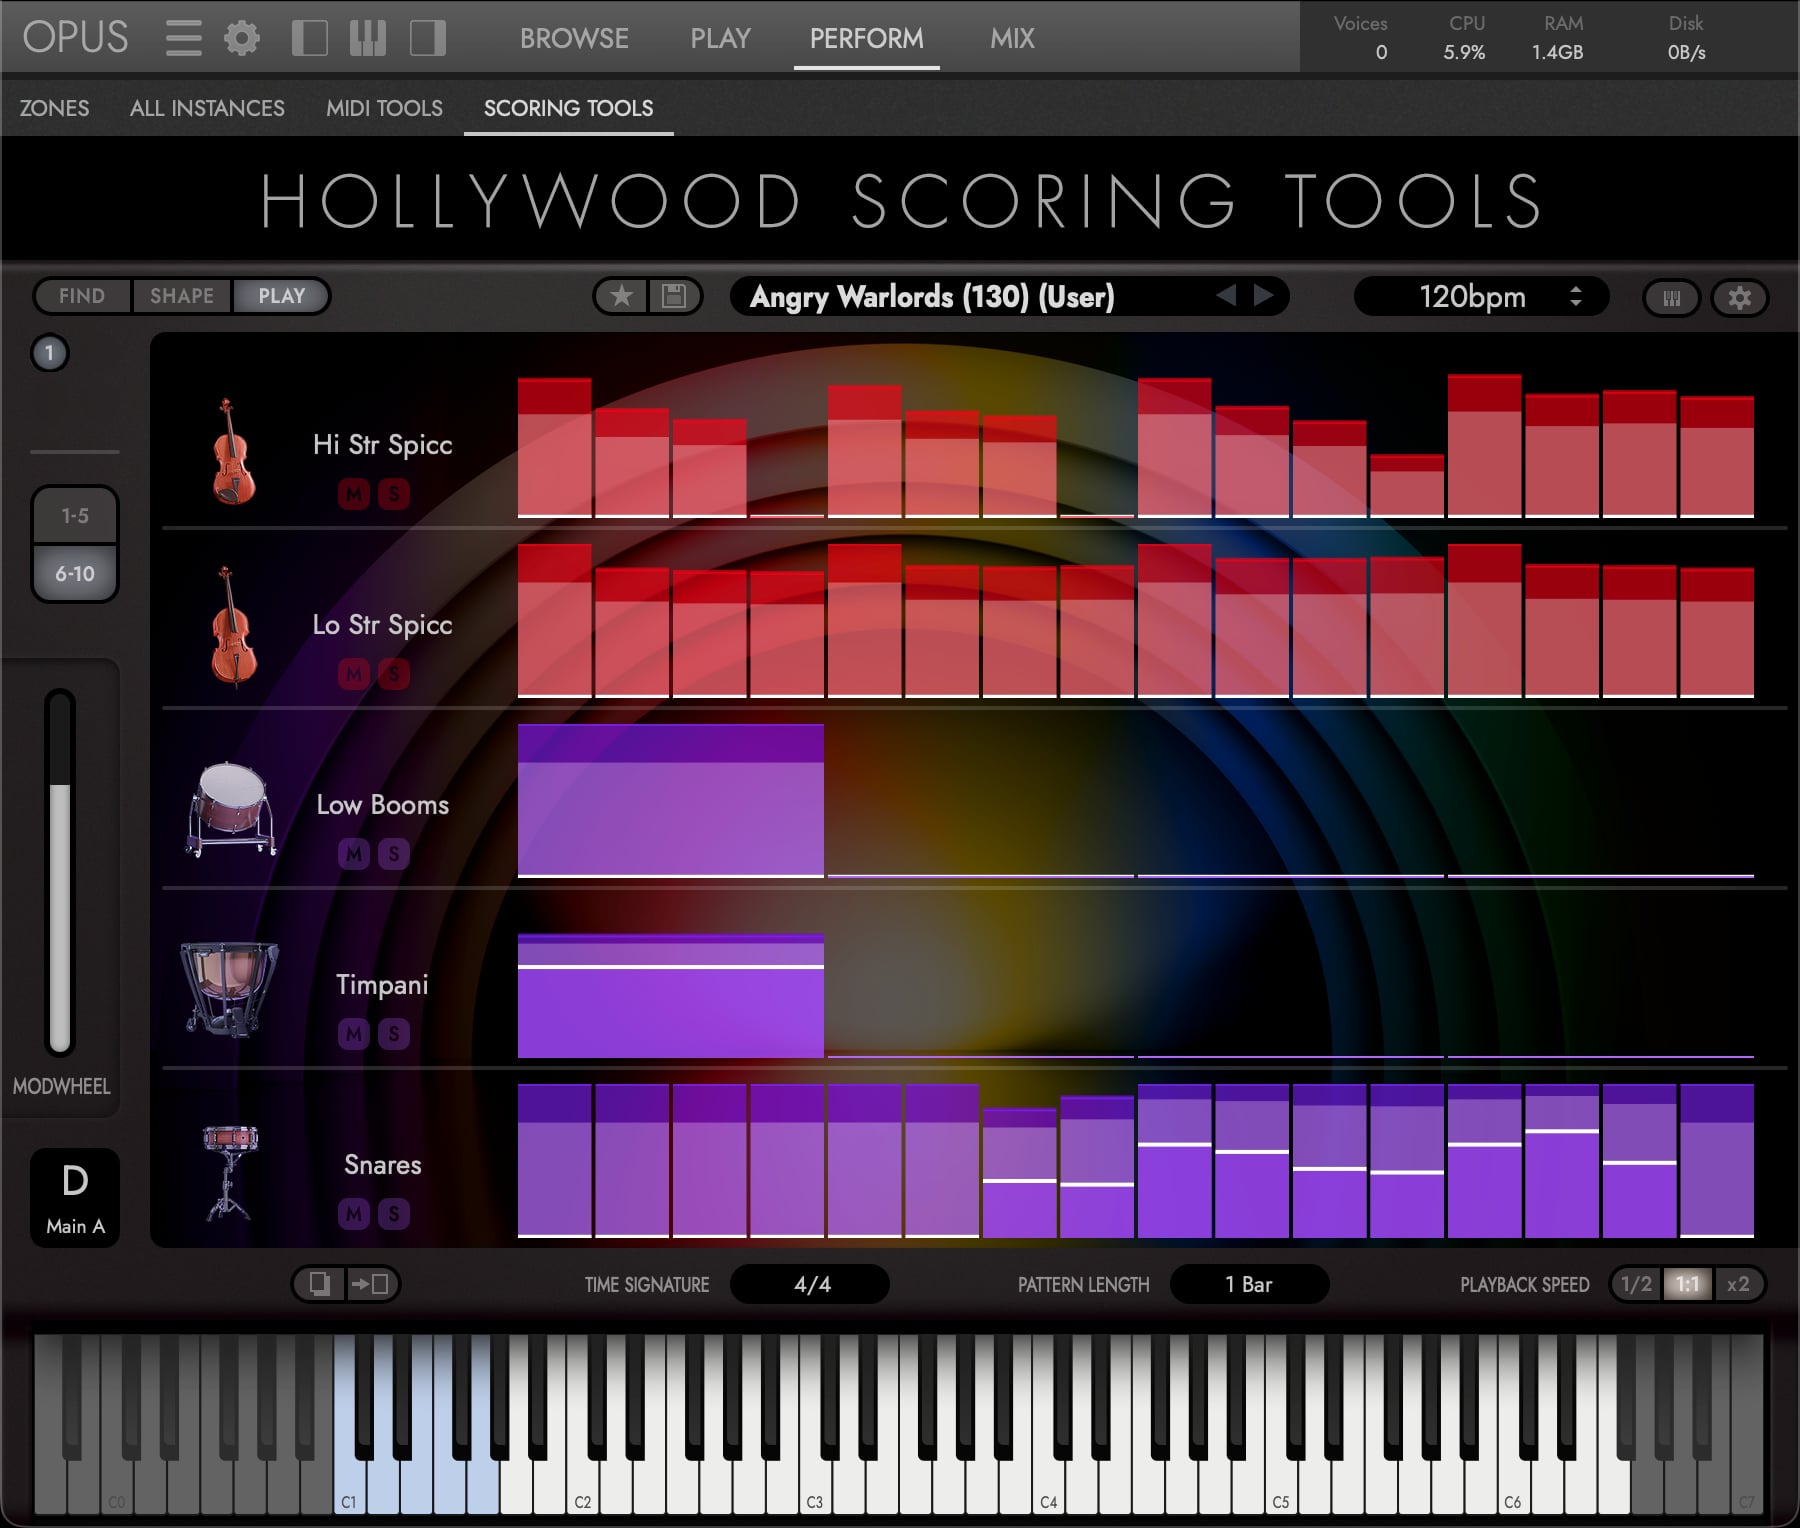
The Play tab is the Arpeggiator, where the patterns that animate each slot are set. Click any slot to set its Note Order, Rate and per-step Velocity ranges. When an arrangement is ready, the MIDI Export button can be used to drag it straight into your DAW as a multitrack MIDI file, one track per slot.
5. Save It as a User Score
Click the Save button beside the Score Bar, give the Score a name, tick its Genre and Style tags and confirm. It appears in the Scores column with a (User) suffix, and the User filter above the list shows only your own. SECTION 2.3.2 SCORE BROWSER, E. User Scores, covers where the file lives and how to edit, delete and rescan your Scores.
CONTINUE READING | SECTION 2.3.2 SCORE BROWSER, 2.3.3 DYNAMIC MIXER, 2.3.4 SECTIONS & KEYSWITCHES, 2.3.5 ARPEGGIATOR and 2.3.6 EFFECTS cover each of these in full.
D Single Instruments
Every instrument the Scoring Engine uses to create arrangements is also available on its own, where the four Opus pages work together in the usual way: Browse finds an instrument, Play shapes instrument-level controls, Perform handles multi-instrument controls, and Mix balances and treats the result.
1. Browse the Categories
Go back to the Browse page (see §B. Load Scoring Tools above) to access 164 instruments across five categories. Click EW Hollywood Scoring Tools in the list of installed libraries, then click a Category and a sub-category to populate the Results List with the instruments in that directory (Orchestral ▸ Strings for example). Click once on an instrument for a single-note preview, double-click to load it, or hold Option (Alt) while double-clicking to add it alongside what is already loaded.
2. Play an Instrument
Opus opens the Play page on the Player sub-page, showing that instrument’s own controls. Play it from your keyboard as you would any other EastWest instrument. If Opus stays on the Browse page instead, see the note in §B above.
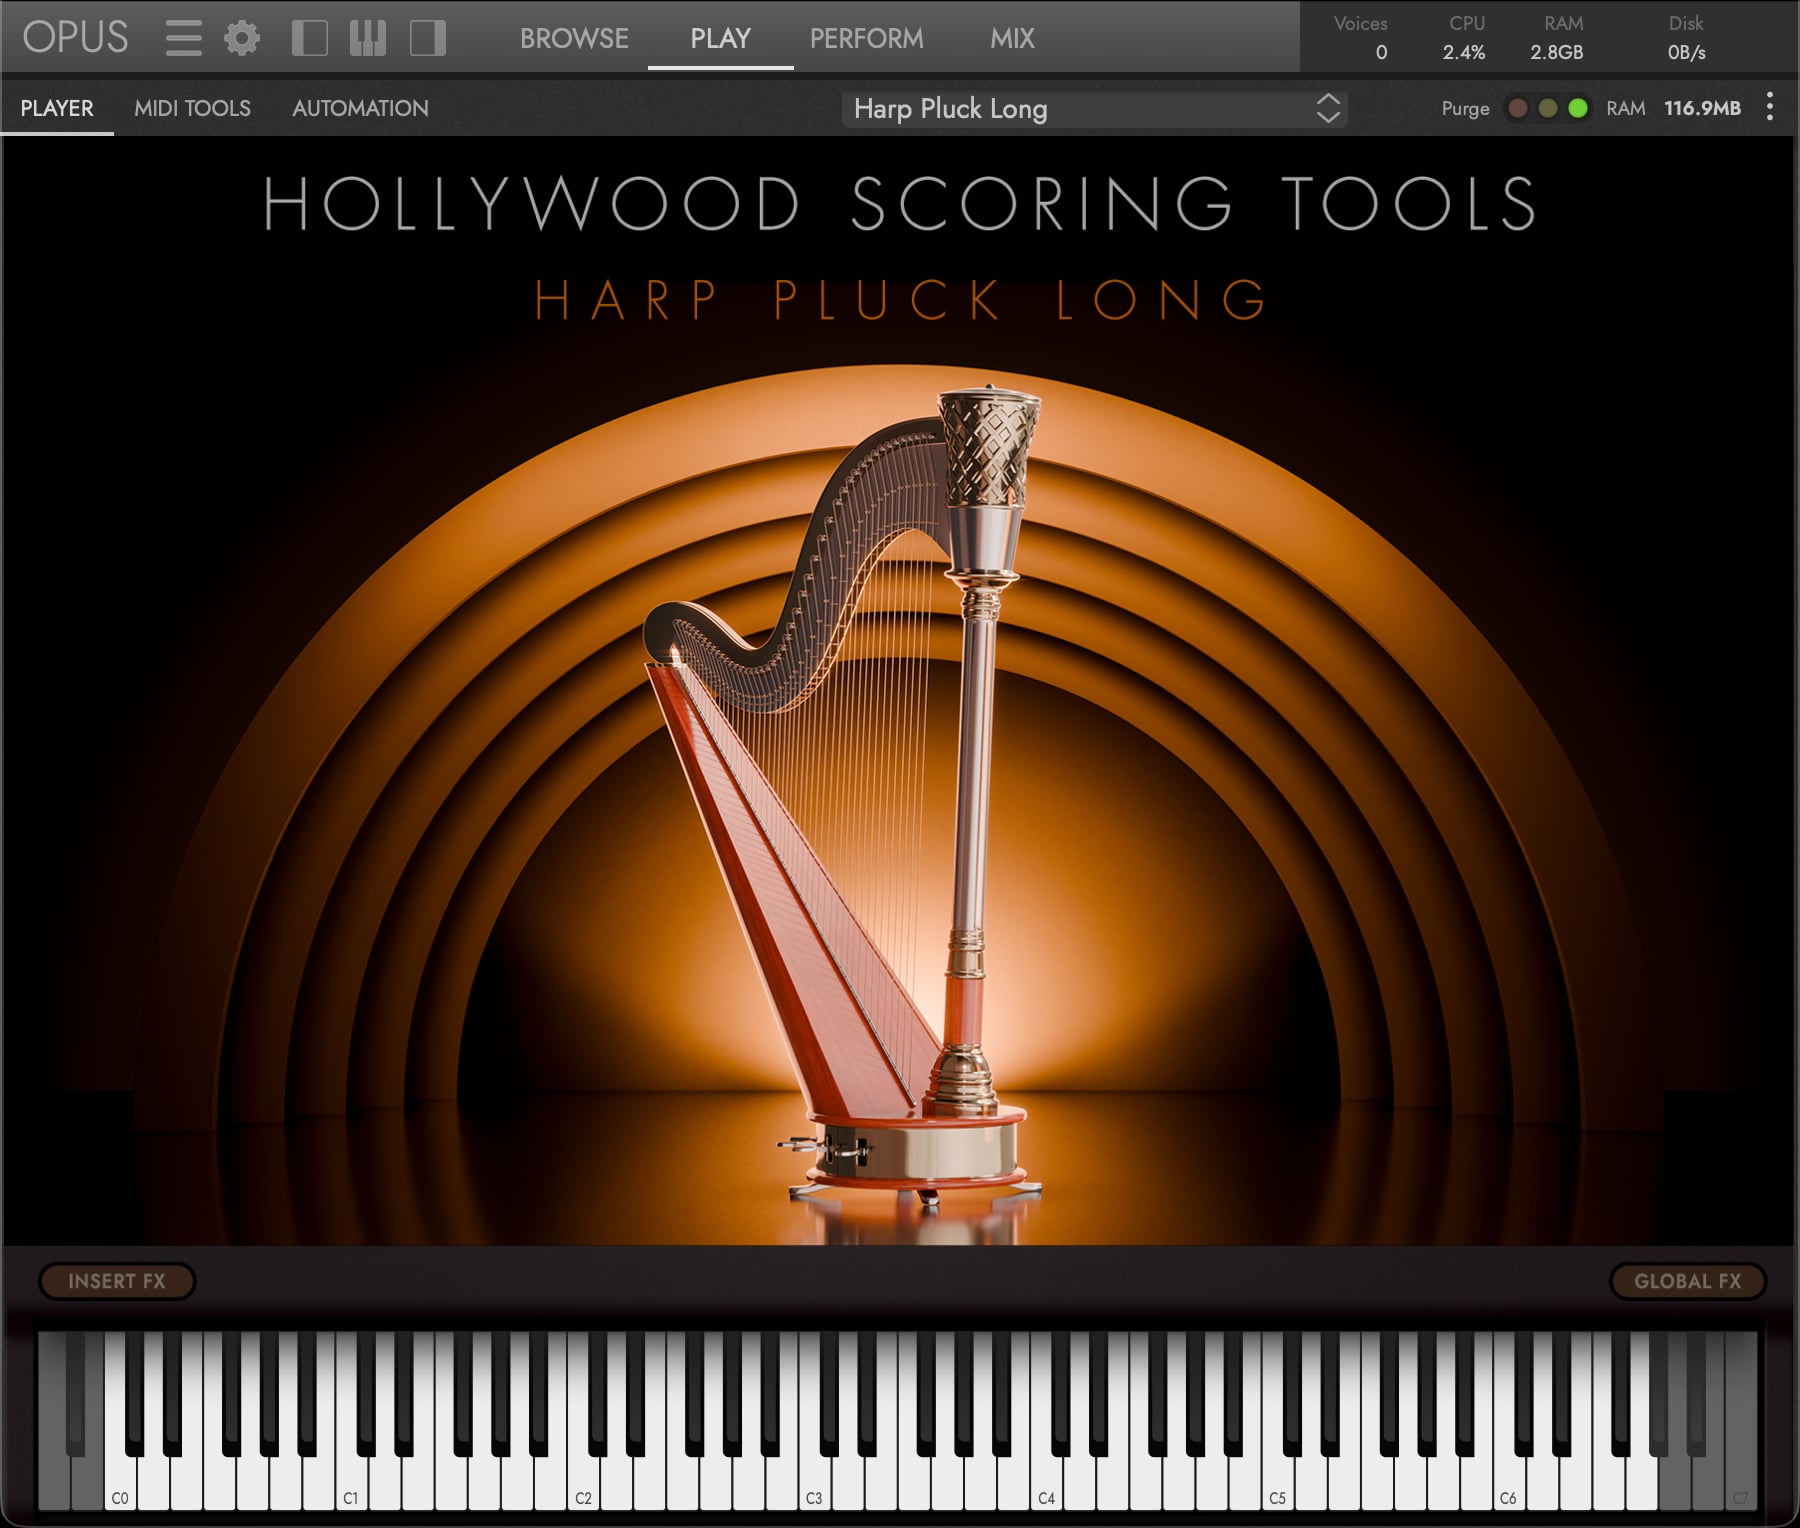
Just above the Virtual Keyboard, Insert FX carries that instrument’s own effect slots and Global FX carries the reverb effects shared across the whole instrument.
CONTINUE READING | SECTION 2.2 CONTROLS for what appears on the Player sub-page, and the Opus sub-pages alongside it.
3. Build a Performance
Load more than one instrument and the Perform page is where they work together. The Zones sub-page lists everything currently loaded and sets each one’s Key Range, Octave, Group and Voice Limit, which is how a keyboard split is built: strings under the left hand, a solo line under the right.
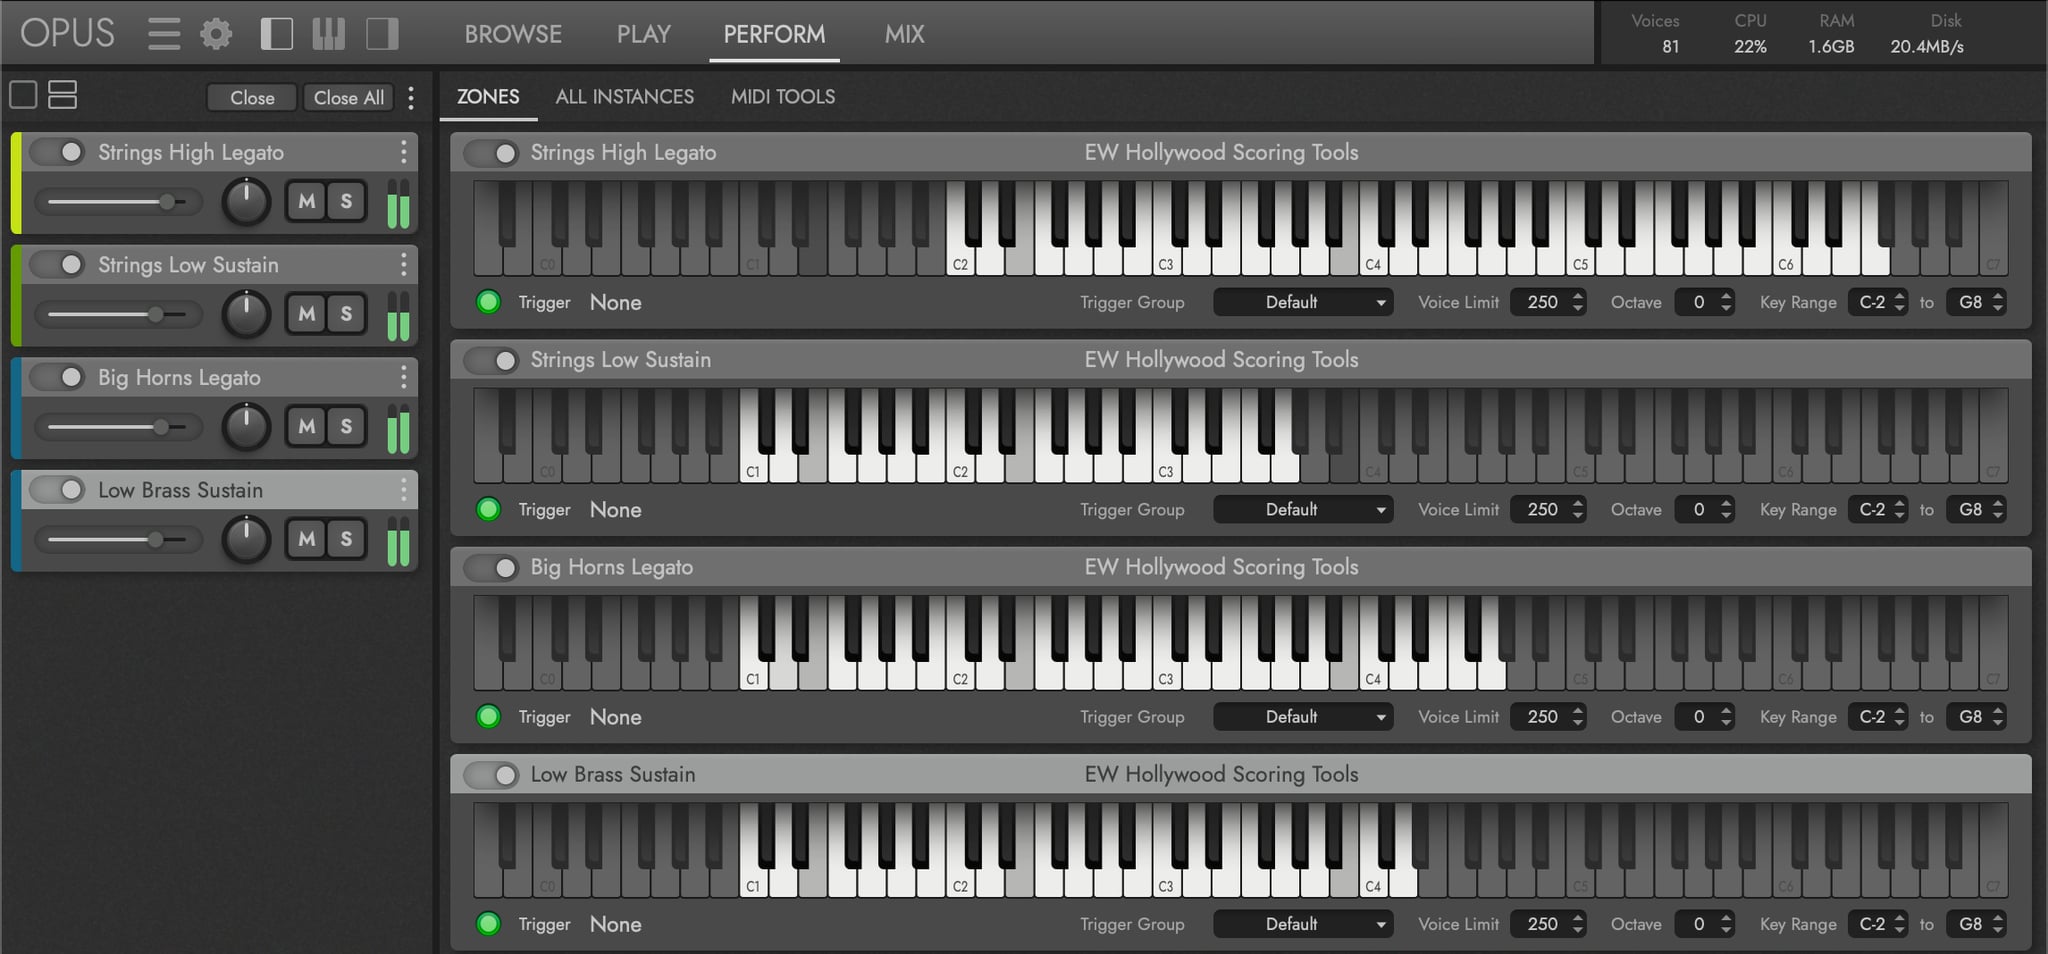
MIDI triggers can be used to switch between them as you play, on a keyswitch, a velocity threshold, a controller such as the mod wheel, or a program change.
OPUS SOFTWARE MANUAL | SECTION 2.3 THE PERFORM PAGE covers the page and its sub-pages, and SECTION 2.3.1 ZONES SUB-PAGE covers instrument properties and MIDI triggers in full.
4. Polish the Sound
The Mix page gives each loaded instrument its own mixer tab. That instrument’s channels appear in the Mixer Area, one per microphone position or layer, plus a Master and any sub mixer and FX bus channels the product ships with.
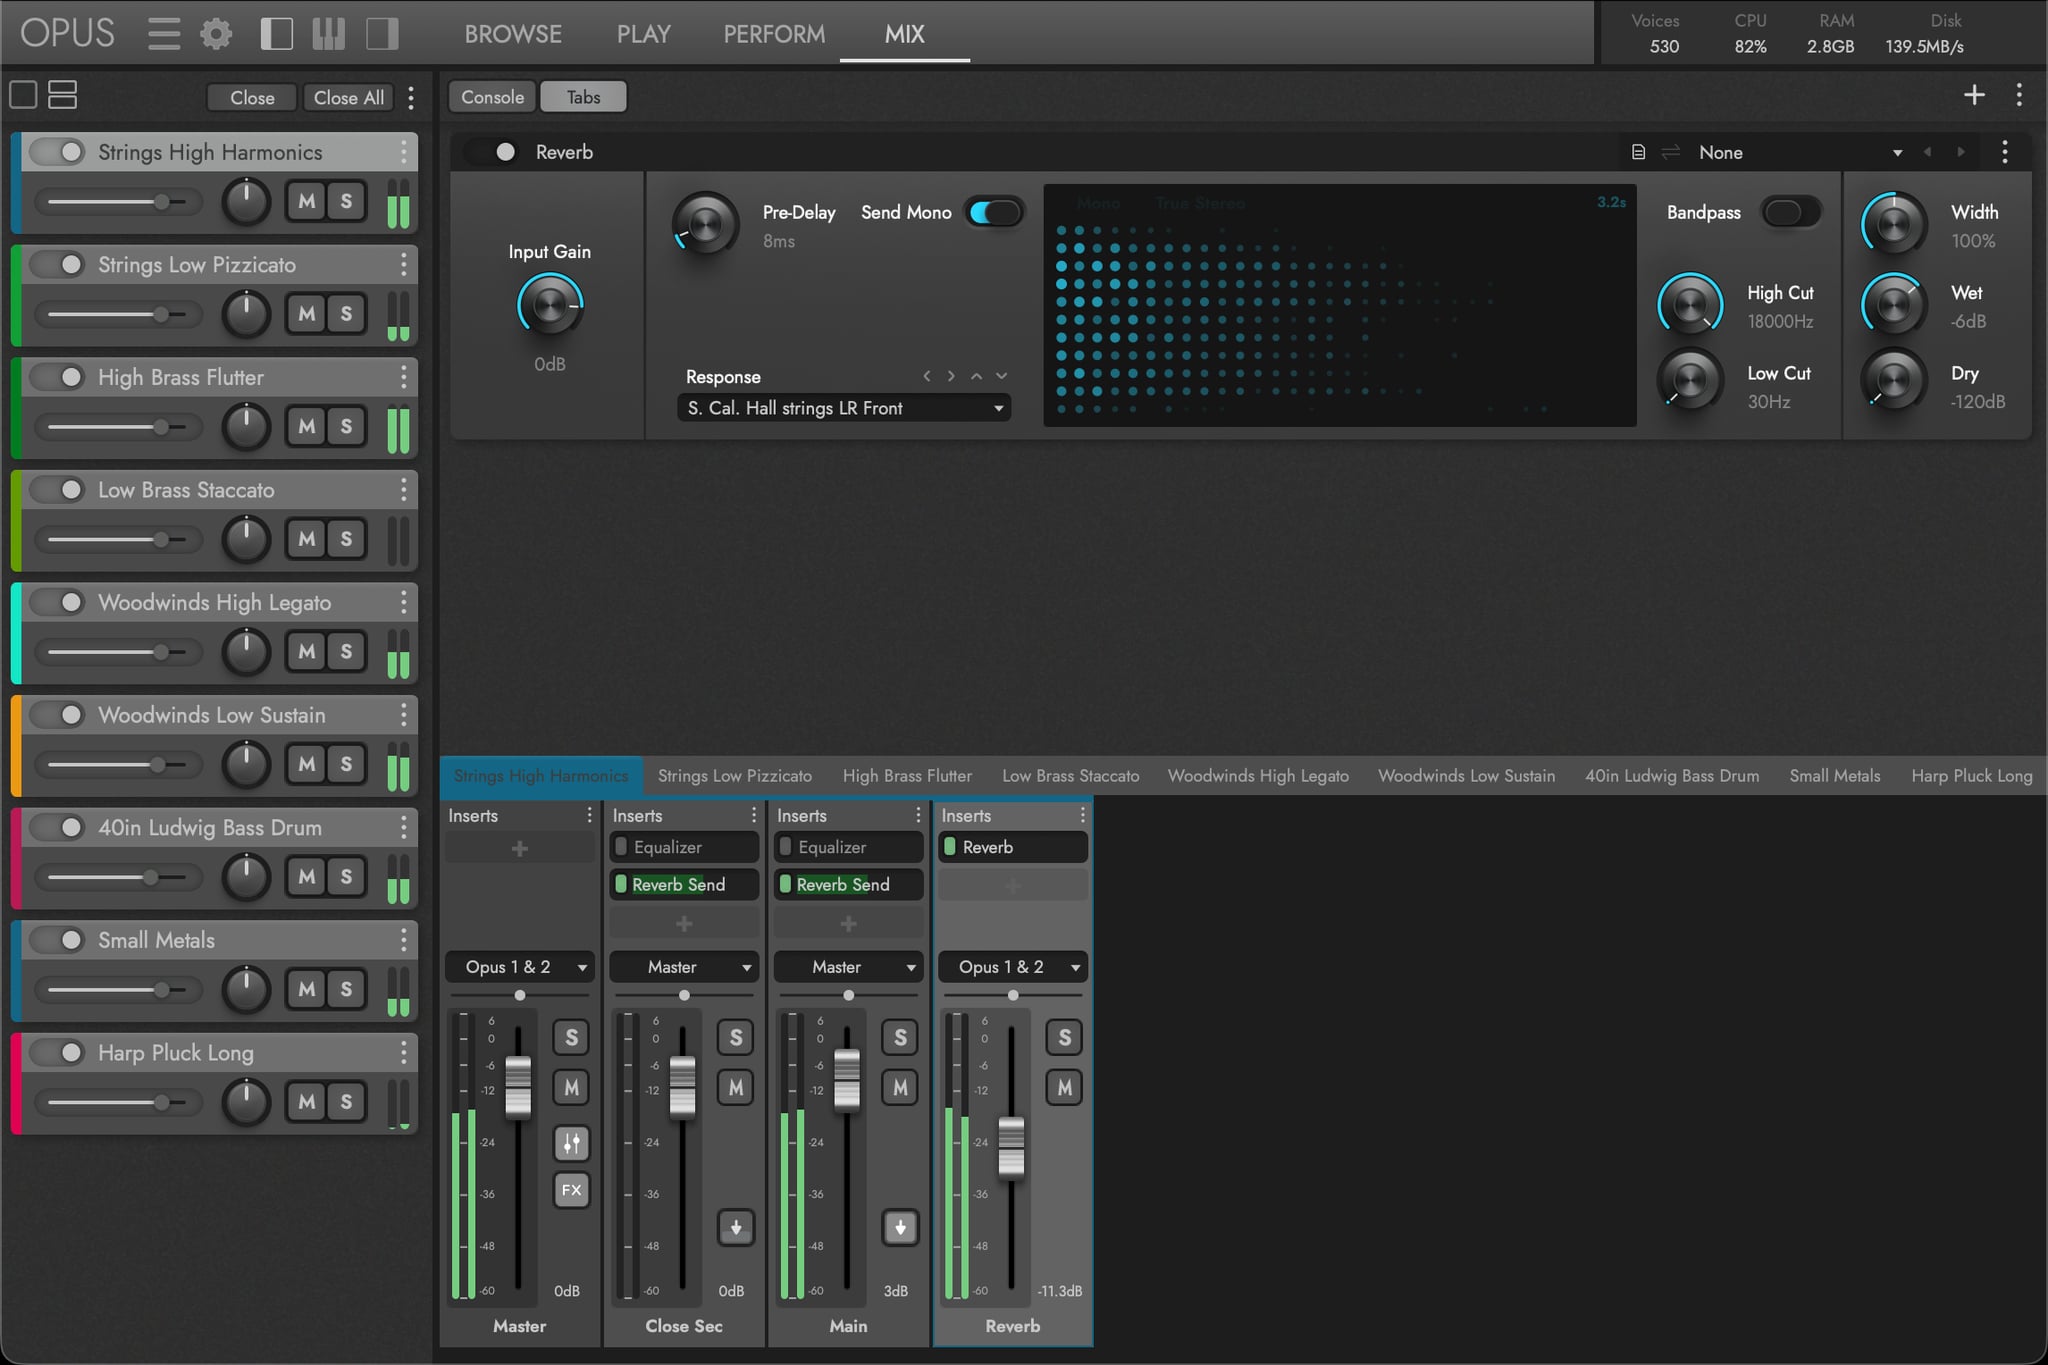
The Inserts at the top of each channel open the full Opus effects list: EQ, dynamics, distortion, modulation, harmonics, delay and reverb. Effect sends route a channel to an FX bus so several instruments can share one reverb, and anything set here is saved with the performance.
OPUS SOFTWARE MANUAL | SECTION 2.4 THE MIX PAGE covers mixing in full, with SECTION 2.4.1 MIXER AREA on the channels, SECTION 2.4.2 EFFECTS AREA on inserts and effect sends, and SECTION 2.4.3 EFFECTS LIST documenting all 33 effects.
E Powered by Opus
Hollywood Scoring Tools runs inside Opus, the EastWest sample engine. Opus handles browsing and loading, the Instrument Rack, the mixer and its effects, multi-instrument performances, MIDI processing and automation, while Hollywood Scoring Tools supplies the sounds, the Scoring Engine and its own controls on top.
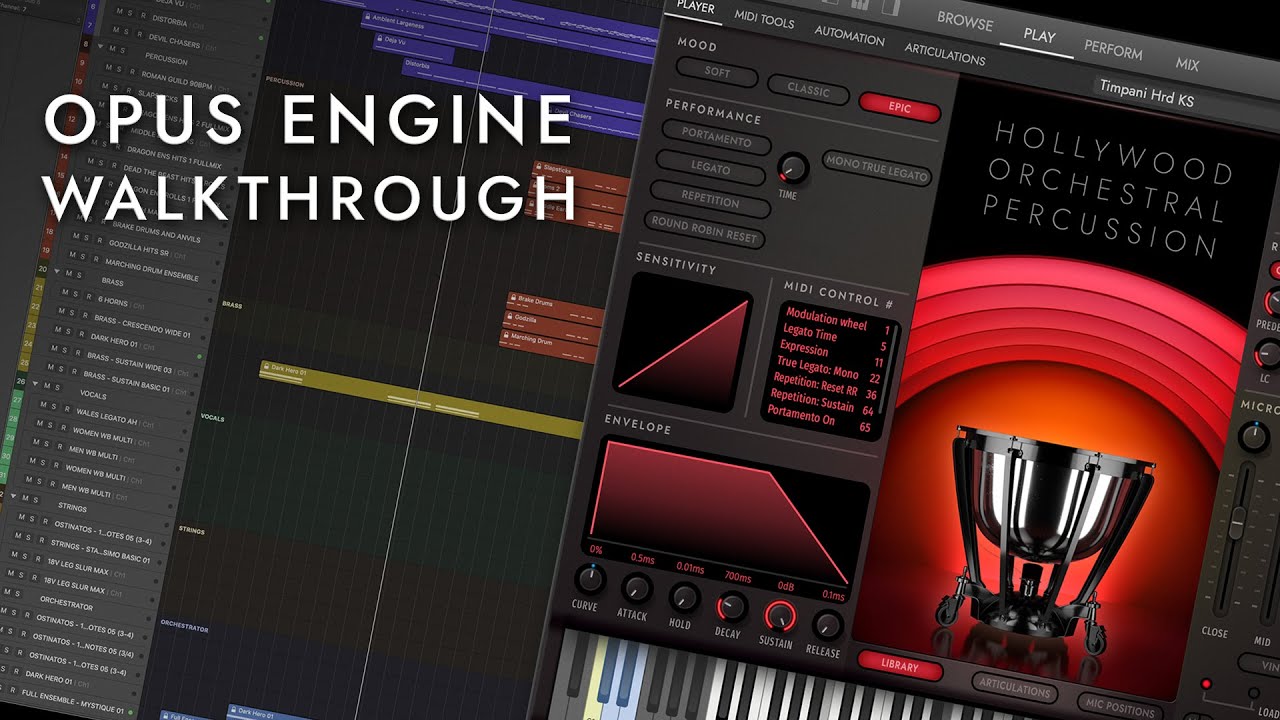
Anything in this manual described as an Opus feature is documented in full in the Opus Software Manual, available from the Settings Menu under Help.
OPUS SOFTWARE MANUAL | SECTION 1.1.1 WALKTHROUGH covers first-launch setup, Auto Update and audio and MIDI configuration in full, and SECTION 1.1.2 USER INTERFACE covers the Navigation Bar, Instrument Rack, Virtual Keyboard and Inspector.
F Where to Go Next
- SECTION 2.1 INSTRUMENTS: the performance file and all 164 instruments, by category.
- SECTION 2.3 SCORING ENGINE: the composition environment in depth.
- SECTION 2.2 CONTROLS: playing one instrument on its own.
- SECTION 1.3 PRODUCT SUPPORT: videos, community and support.